Creating Custom Tools
Step-by-step guide to enabling, configuring, testing, and deploying prebuilt custom tools in Cosmos
Updated 2026-11-03
Verified 2026-11-03
Custom tools are prebuilt integrations published to your organization's tool catalog. Each one runs its own logic, such as a search service, a messaging service, or a business calculation, and declares the settings it needs (for example an API key) and the inputs an agent passes when it calls it. You configure a custom tool once, then attach it to agents like any other tool.
Overview
Use a custom tool when the integration you need is already in the catalog. If you need to call your own HTTP endpoint, create an API tool. To query a database, create a Database tool.
Custom tools follow the same lifecycle as other tools: configure, save a draft, test, and deploy.
Prerequisites
- A Cosmos account with permission to view and configure custom tools.
- Any credentials or settings the tool needs, such as an API key for the external service.
Step-by-Step
Step 1: Open the Custom Tools page
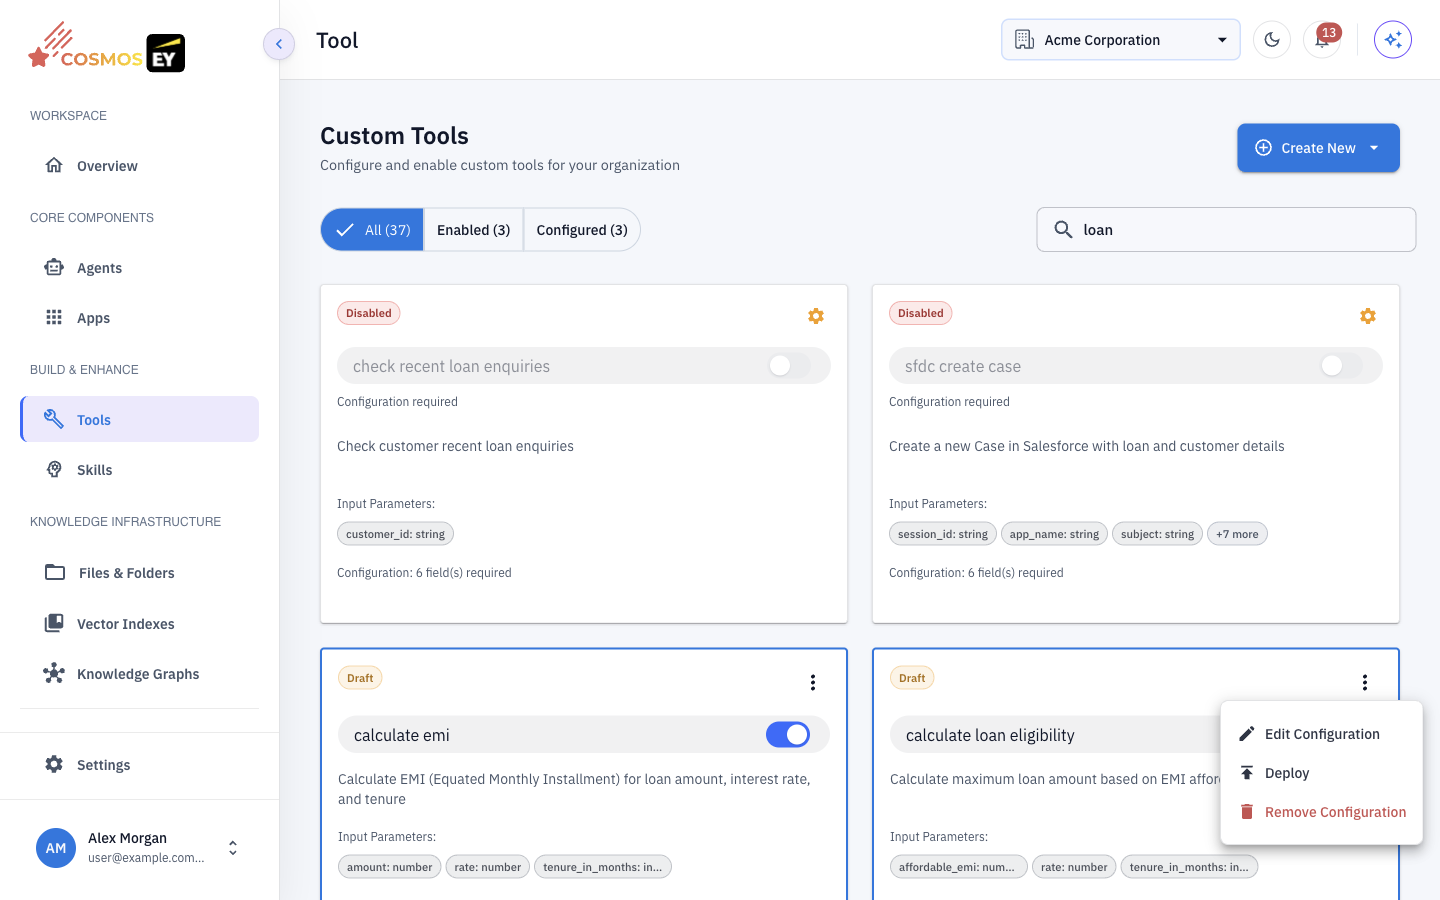
The Custom Tools page, under Tools, lists the catalog as cards. Use the All, Enabled, and Configured filters to narrow the list.
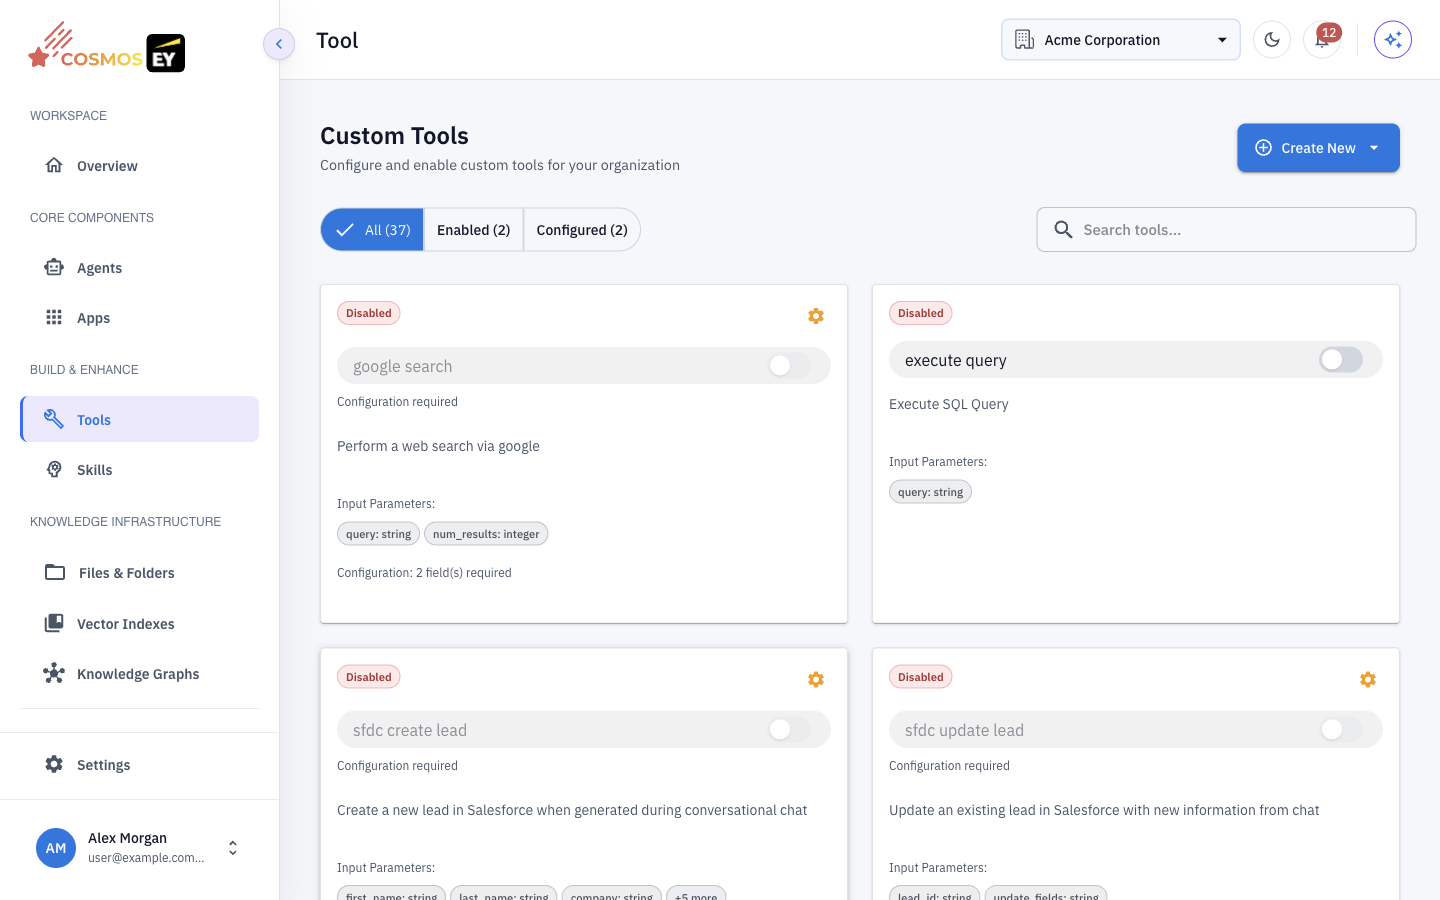
| Status | Meaning |
|---|---|
| Disabled | Available in the catalog but not enabled for your organization. |
| Not Configured | Enabled, but required settings are missing. |
| Draft | Configured but not deployed. |
| Deployed | Live and available to agents. |
Step 2: Start the custom tool wizard
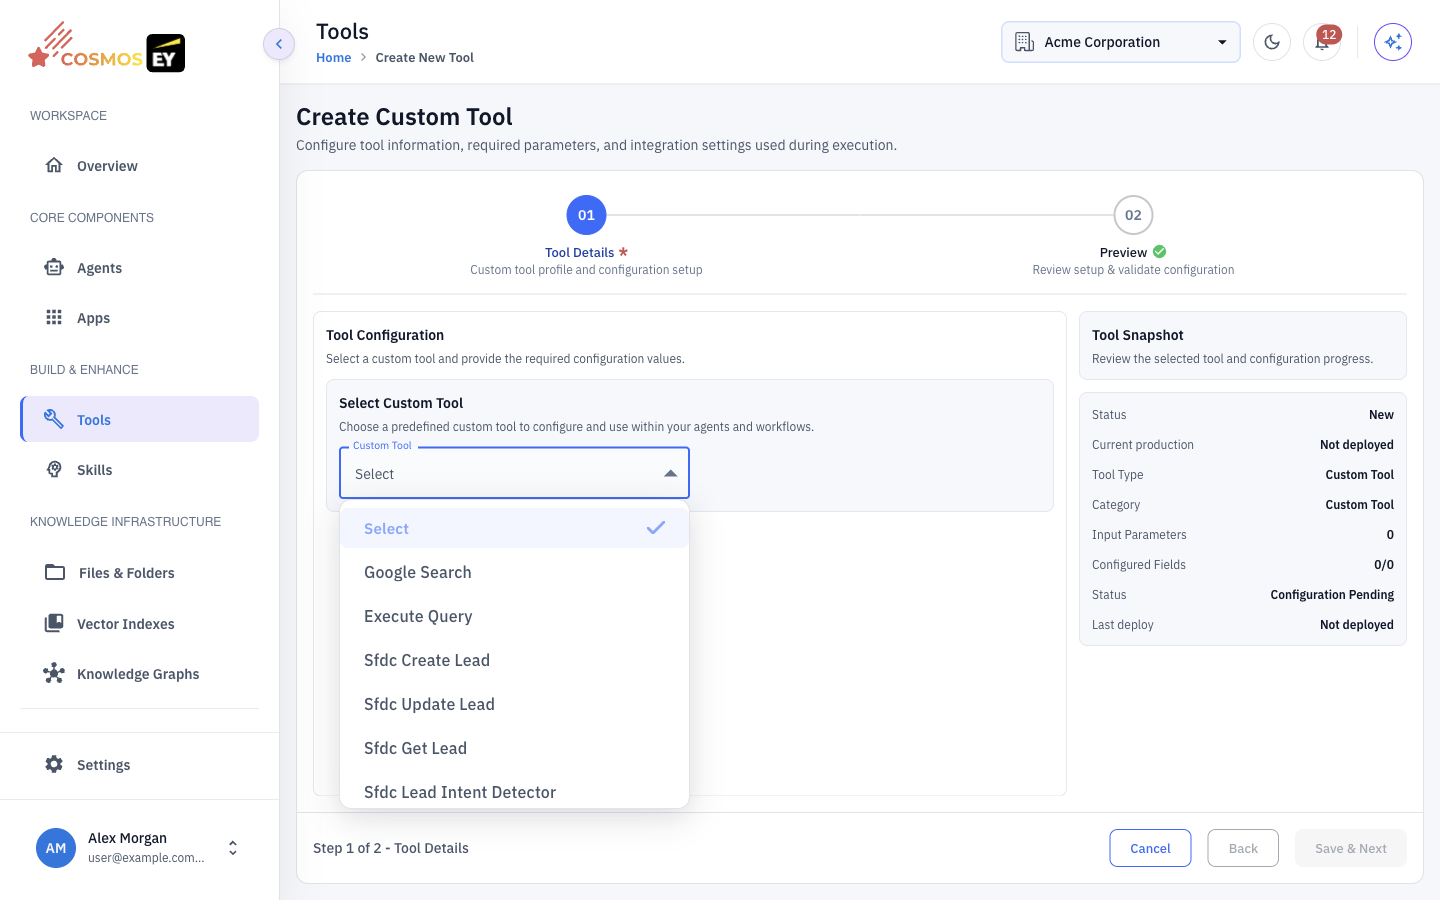
On the Tools Integration page, click Create New and choose Custom Tool. The Create Custom Tool wizard has two steps: Tool Details and Preview.
- Under Select Custom Tool, choose the tool from the Custom Tool list. The tool's name, required setup, input parameters, and description are shown.
Step 3: Configure the tool
Under Tool Configuration, fill in the fields the tool requires. The form is built from the tool's own settings, so the fields differ from tool to tool. Typical fields are API keys and tokens, service URLs, and optional feature switches.
The Tool Snapshot panel shows whether the tool is Ready to Enable or still has Configuration Pending.
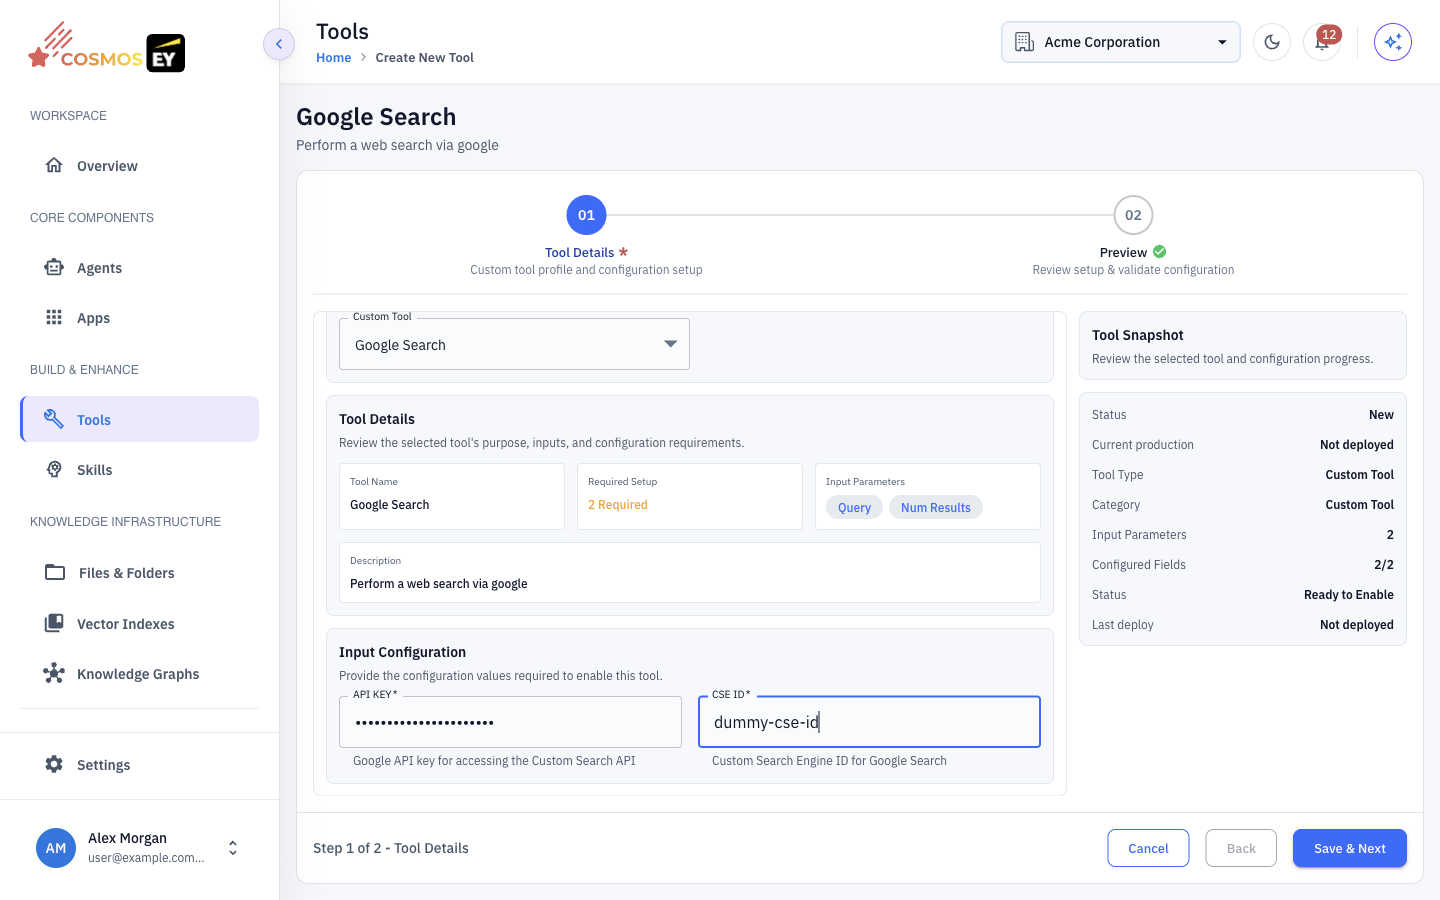
⚠️ Secret values such as API keys are masked after saving. Check them before you save.
Step 4: Review the input configuration
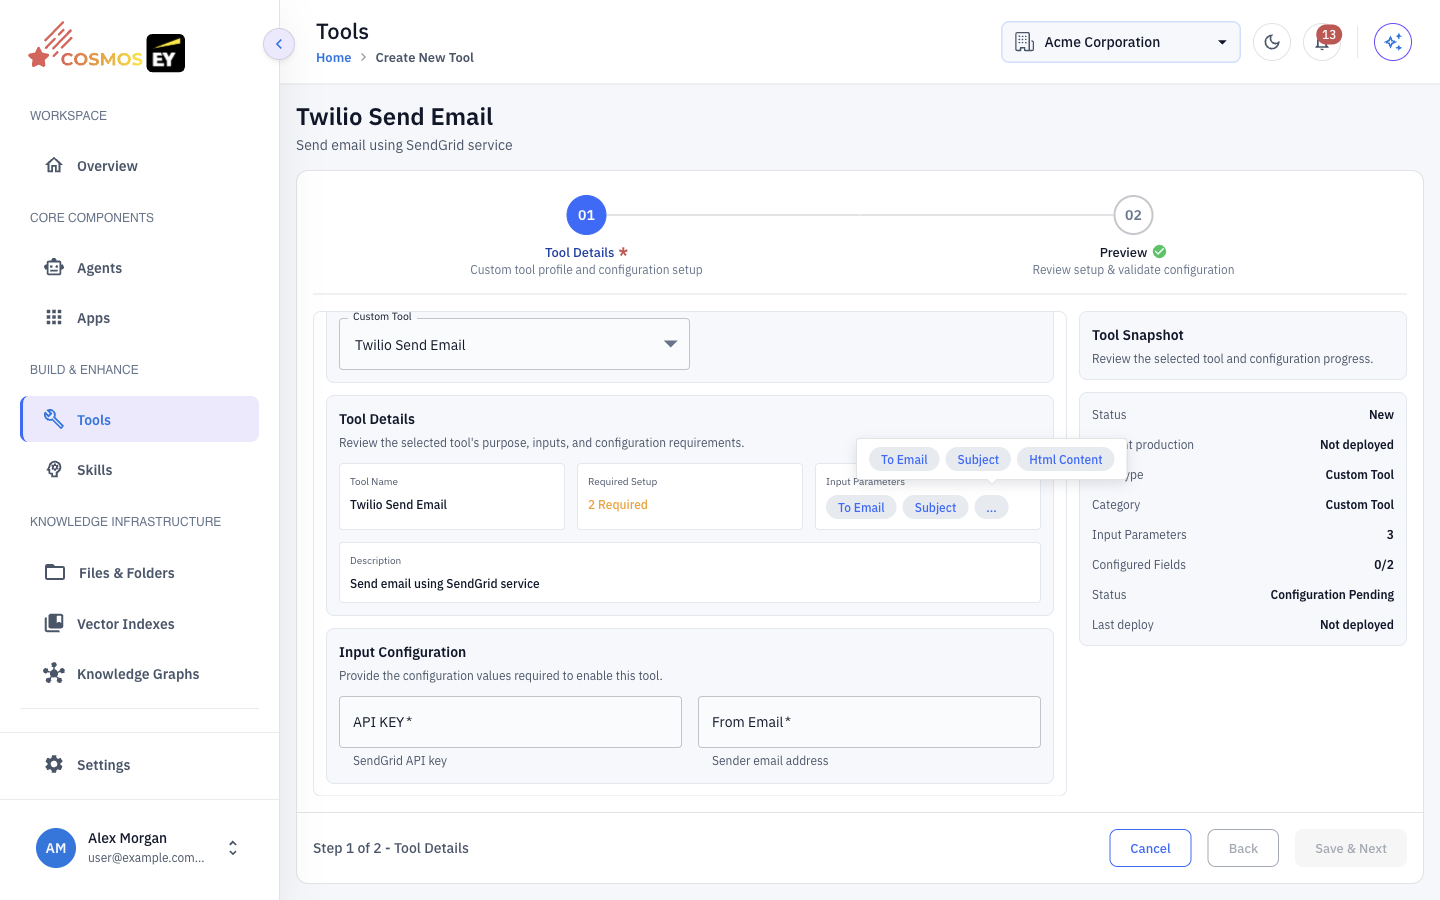
Under Input Configuration, review the parameters the agent will supply each time it calls the tool. Each parameter shows its name, type, description, and whether it is Required or Optional.
Step 5: Preview and save
The Preview step shows Review Custom Tool Configuration with the Tool Profile, the Input Configuration, and Version & Activity. When it shows Ready to save draft, click Save.
Step 6: Test and deploy
From the tool's card on the Custom Tools page you can Test Tool, Edit Configuration, Deploy, or Remove Configuration.
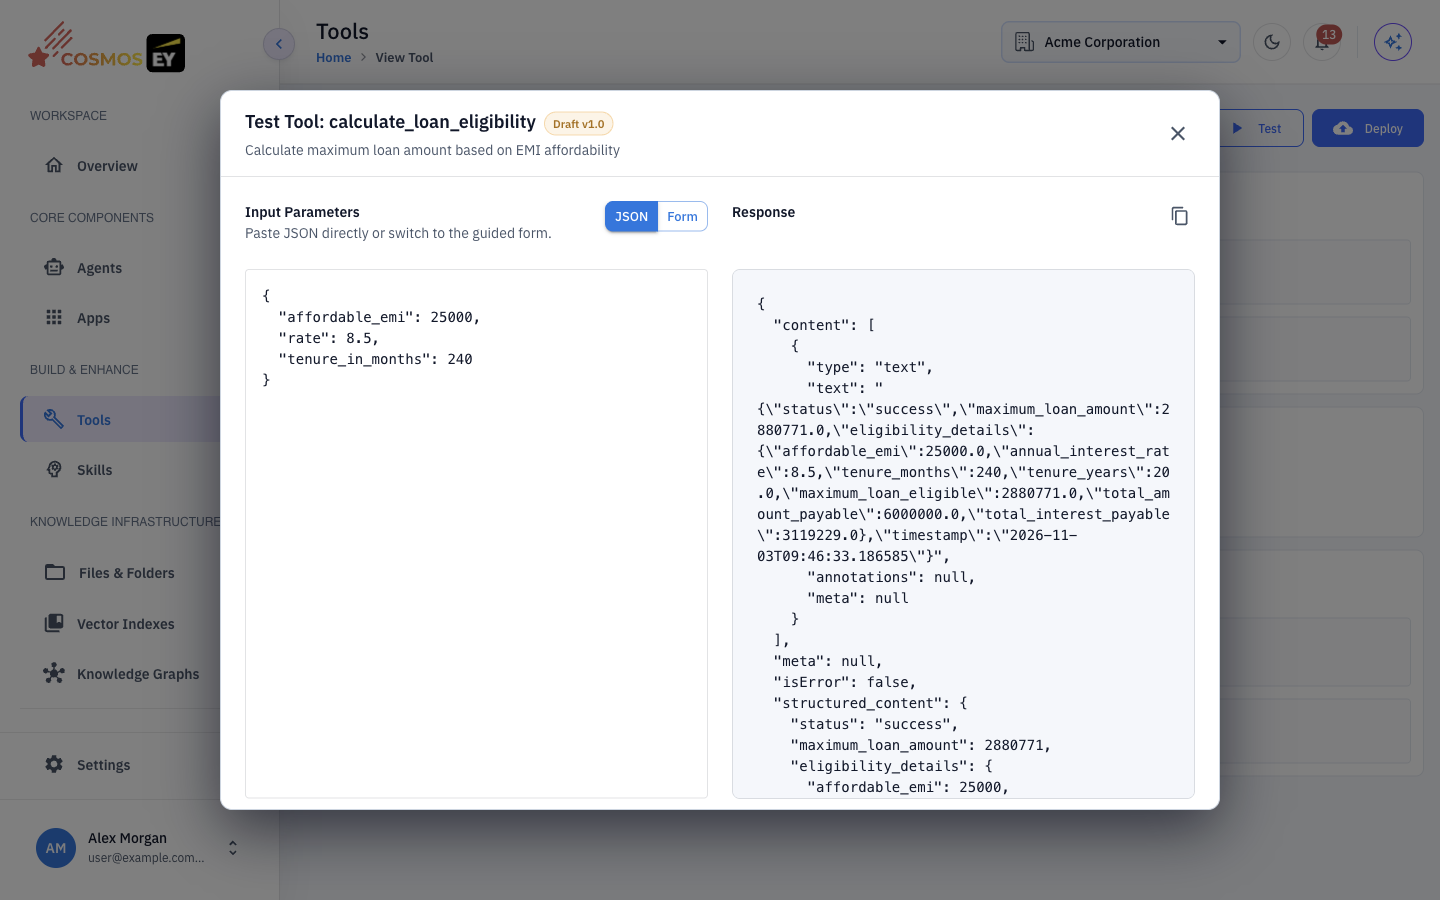
- Click Test Tool, enter values for the Input Parameters, and run the test. Check the Response.
- Click Deploy. The status changes to Deployed, and the tool appears in the Custom Tools tab when you attach tools to an agent.
Configuration Settings vs Input Parameters
| Configuration settings | Input parameters | |
|---|---|---|
| Purpose | Credentials and fixed settings | Values for one call |
| Who fills them in | You, once, during setup | The agent, every time it calls the tool |
| Where | Tool Configuration | Input Configuration |
Configuration values are stored securely and applied when the tool runs.
Tips & Best Practices
- Enable and test one tool at a time before you build multi-tool agents.
- Keep secrets in configuration fields, never in names or descriptions.
- After you change a tool's configuration, test it and deploy it again so agents use the new settings.
- If a tool you need is not in the catalog, contact your administrator.