Knowledge Base & Document Indexing
Guide to uploading files, creating vector indexes and knowledge graphs, and grounding agents in your documents
Updated 2026-11-03
Verified 2026-11-03
Overview
The knowledge base lets agents search your organization's documents during conversations. Instead of relying only on what the model already knows, the agent retrieves relevant passages from your files and uses them to give grounded answers. This is called retrieval-augmented generation (RAG).
In the sidebar, Knowledge Infrastructure has three pages:
| Page | What it is for |
|---|---|
| Files & Folders | Upload, organize, version, and share source documents |
| Vector Indexes | Turn files into searchable vector indexes for semantic search |
| Knowledge Graphs | Extract entities and relationships from files for structured search |
The flow is:
- Upload documents to Files & Folders.
- Create a vector index or knowledge graph from those files. Cosmos parses the documents, splits them into chunks, and creates embeddings.
- Attach the index or graph to an agent. When a user asks a question, the agent searches it and uses the most relevant passages.
Prerequisites
- Documents to upload, such as PDF, Word, Excel, PowerPoint, text, CSV, JSON, XML, or images (images are read with OCR).
- An embedding provider configured for your organization. See Bring Your Own Token.
- An agent to attach the index to. See Building & Testing Agents.
Step-by-Step
Step 1: Open Files & Folders
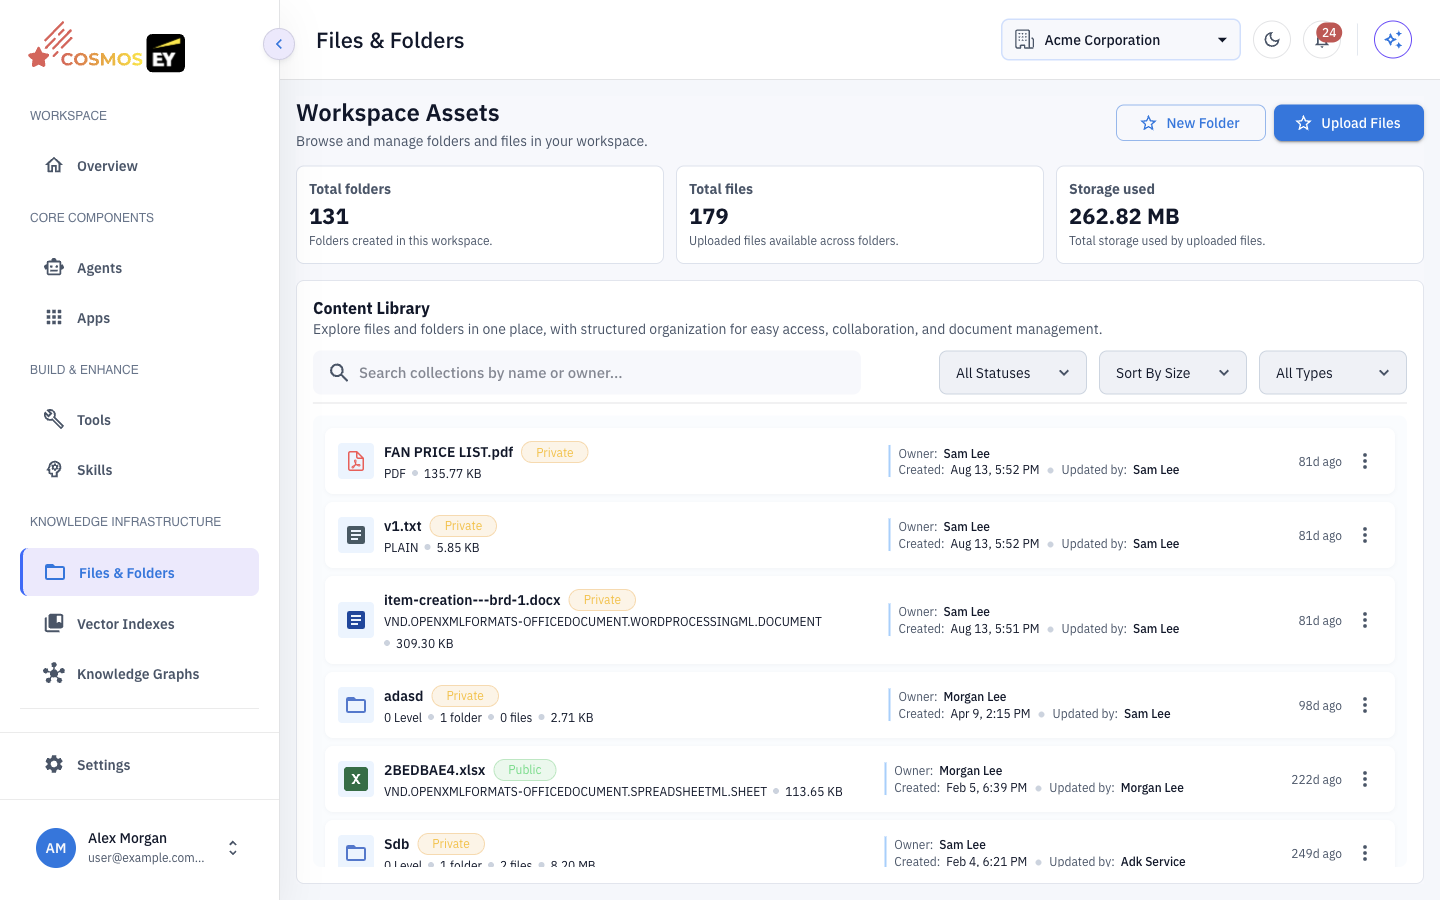
In the sidebar, under Knowledge Infrastructure, click Files & Folders. The Workspace Assets page lists your files and folders.
Step 2: Upload documents
- Optionally click New Folder to group files by topic. Folders can be Private or Public.
- Click Upload Files. Choose Upload File to pick files from your computer, or Import URL to fetch a file from a web address. You can upload up to 5 files at a time.
- Optionally turn on Redact before upload to remove personal information before files are stored. Choose the detection method, Native or Azure AI Language, and keep your organization's default rules or customize them. You can review what was found before the upload completes.
- Wait for the uploads to finish.
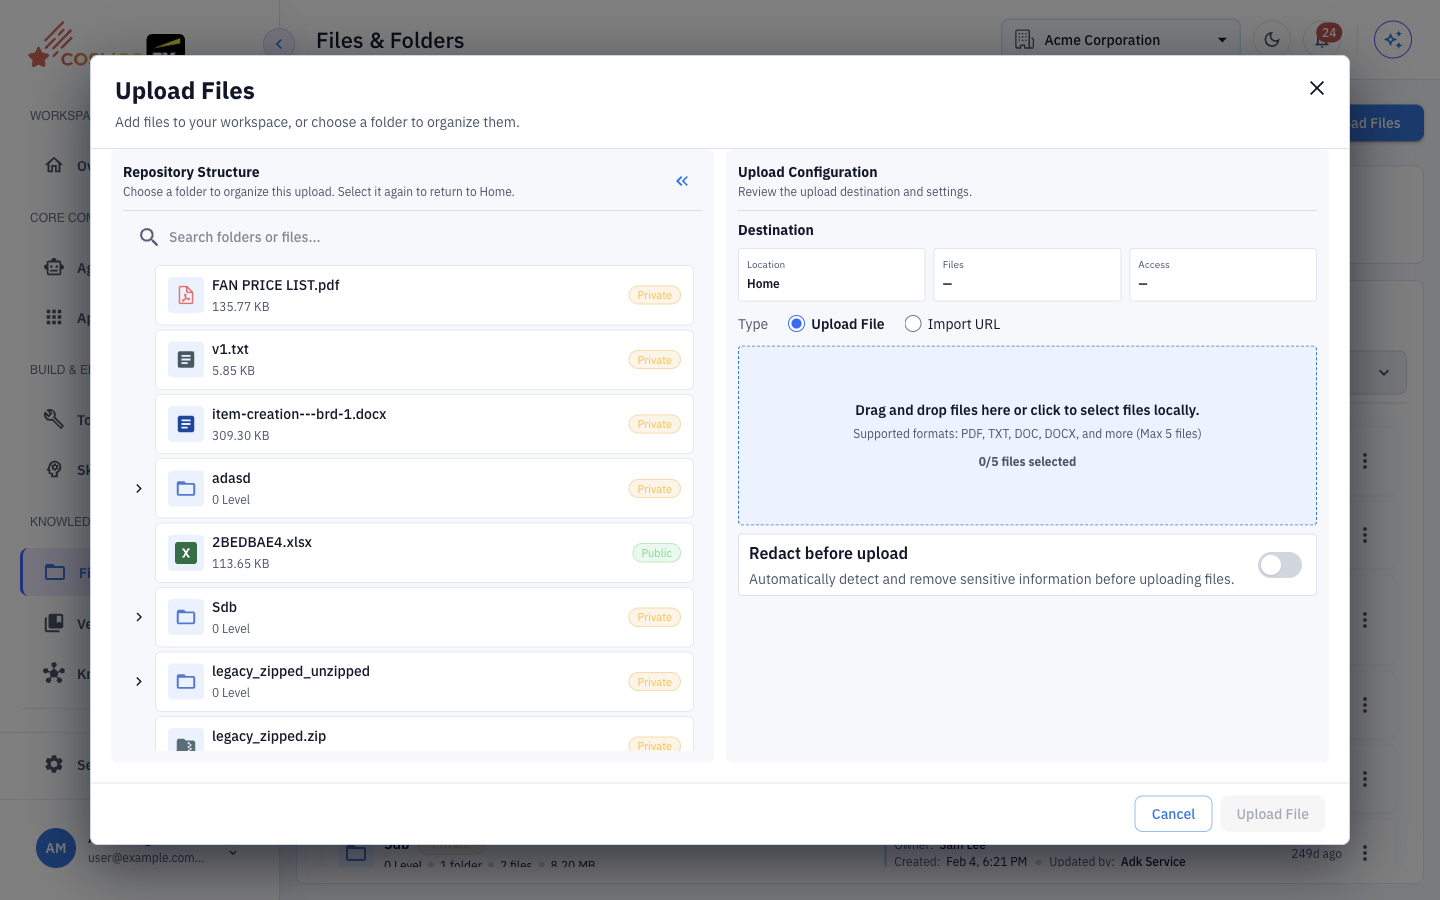
From a file's actions you can Preview, Download, Rename, Move, Delete, Zip or Unzip, Create Index, Manage Versions, and manage access and visibility.
Step 3: Create a vector index
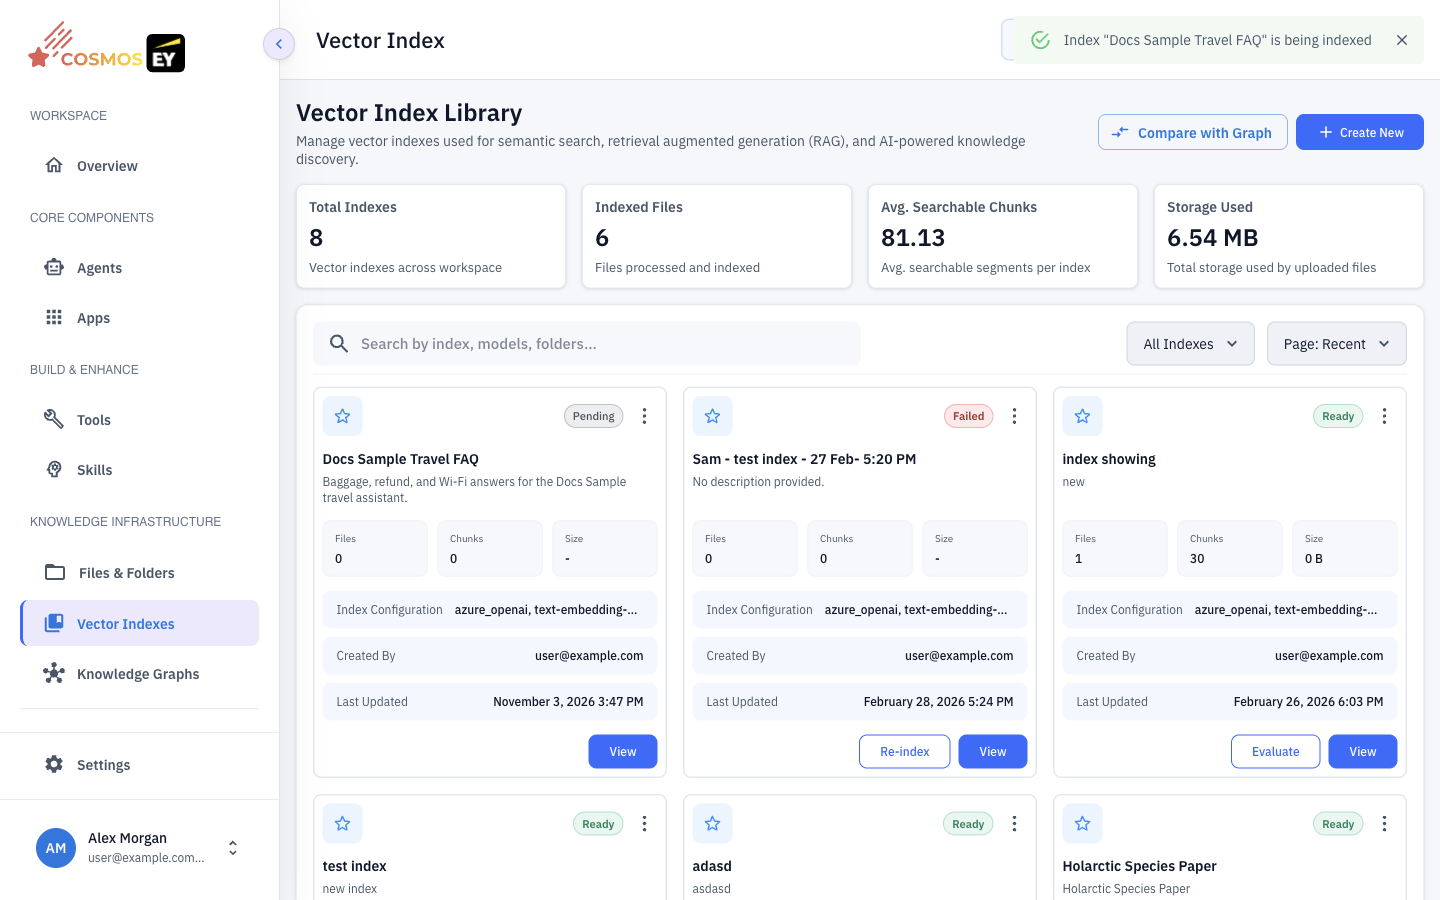
- Open Vector Indexes. The Vector Index Library lists your indexes.
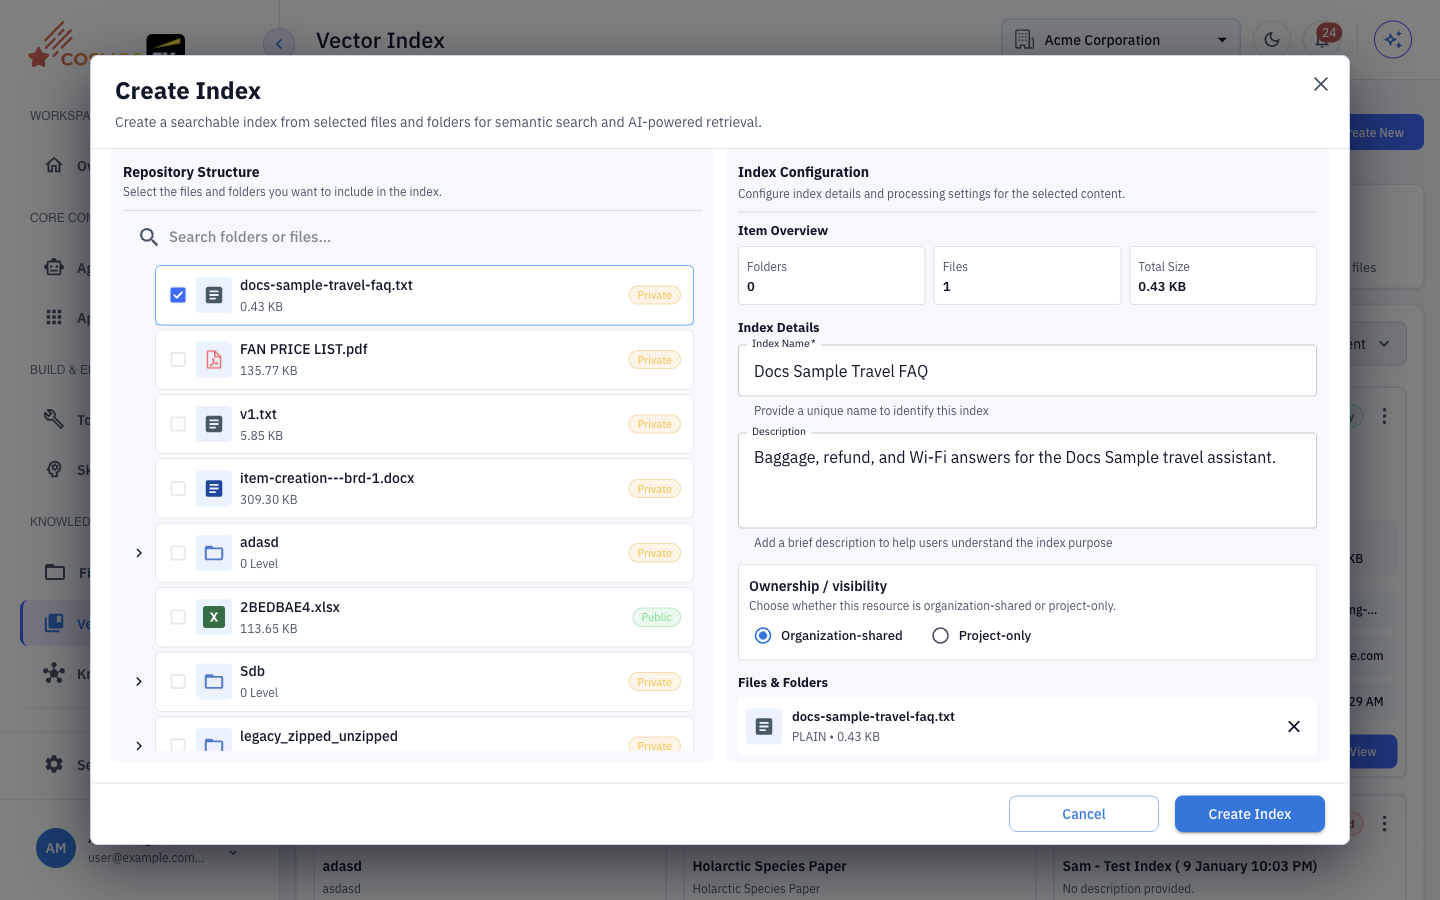
- Click Create New. The Create Index dialog opens.
- Fill in the details:
| Field | Description |
|---|---|
| Index Name | A descriptive name, such as "Product Documentation". |
| Description | Optional summary of the contents. |
| Files / folders | The sources to index. |
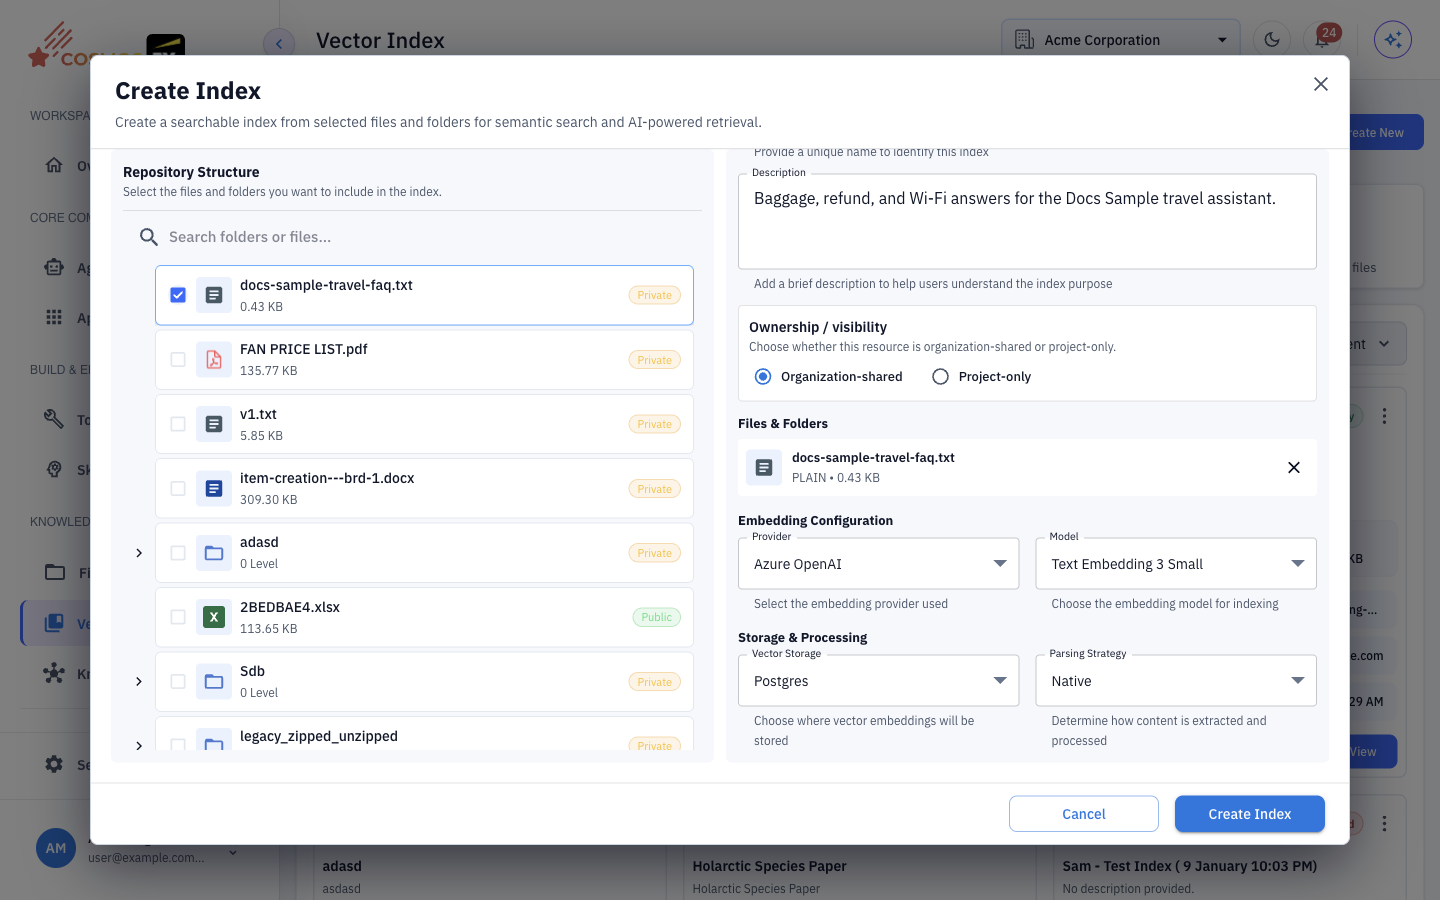
Step 4: Choose indexing settings
| Setting | What it controls |
|---|---|
| Provider and Model | The embedding service and model that turn text chunks into vectors. |
| Vector Storage | Where the vectors are stored and searched. |
| Parsing Strategy | How text is extracted from documents. |
The options come from your organization's provider configuration. Typical parsing strategies are:
| Strategy | Best for |
|---|---|
| Native | Most documents; fast built-in text extraction |
| Table-Heavy | Spreadsheets and documents with many tables |
| Mixed Content | Documents that combine text, tables, and images |
| OCR Required | Scanned documents and image-based PDFs |
| Azure Document Intelligence | High-fidelity extraction with Azure AI, when configured |
Step 5: Monitor indexing
Create the index and watch its status in the library:
| Status | Meaning |
|---|---|
| Pending | Queued; indexing has not started. |
| Indexing | Documents are being parsed, chunked, and embedded. |
| Ready | The index can be searched by agents. |
| Failed | Indexing stopped with an error. Open the index to see why. |
| Cancelled | Indexing was stopped before it finished. |
The library also shows statistics such as Avg. Searchable Chunks and Storage Used.
Step 6: Attach the index to an agent
- Open Agents and create or edit an agent.
- In the Model step, under grounding sources, click Add Vector Index (or Add Knowledge Graph).
- Select one or more indexes and save the agent.
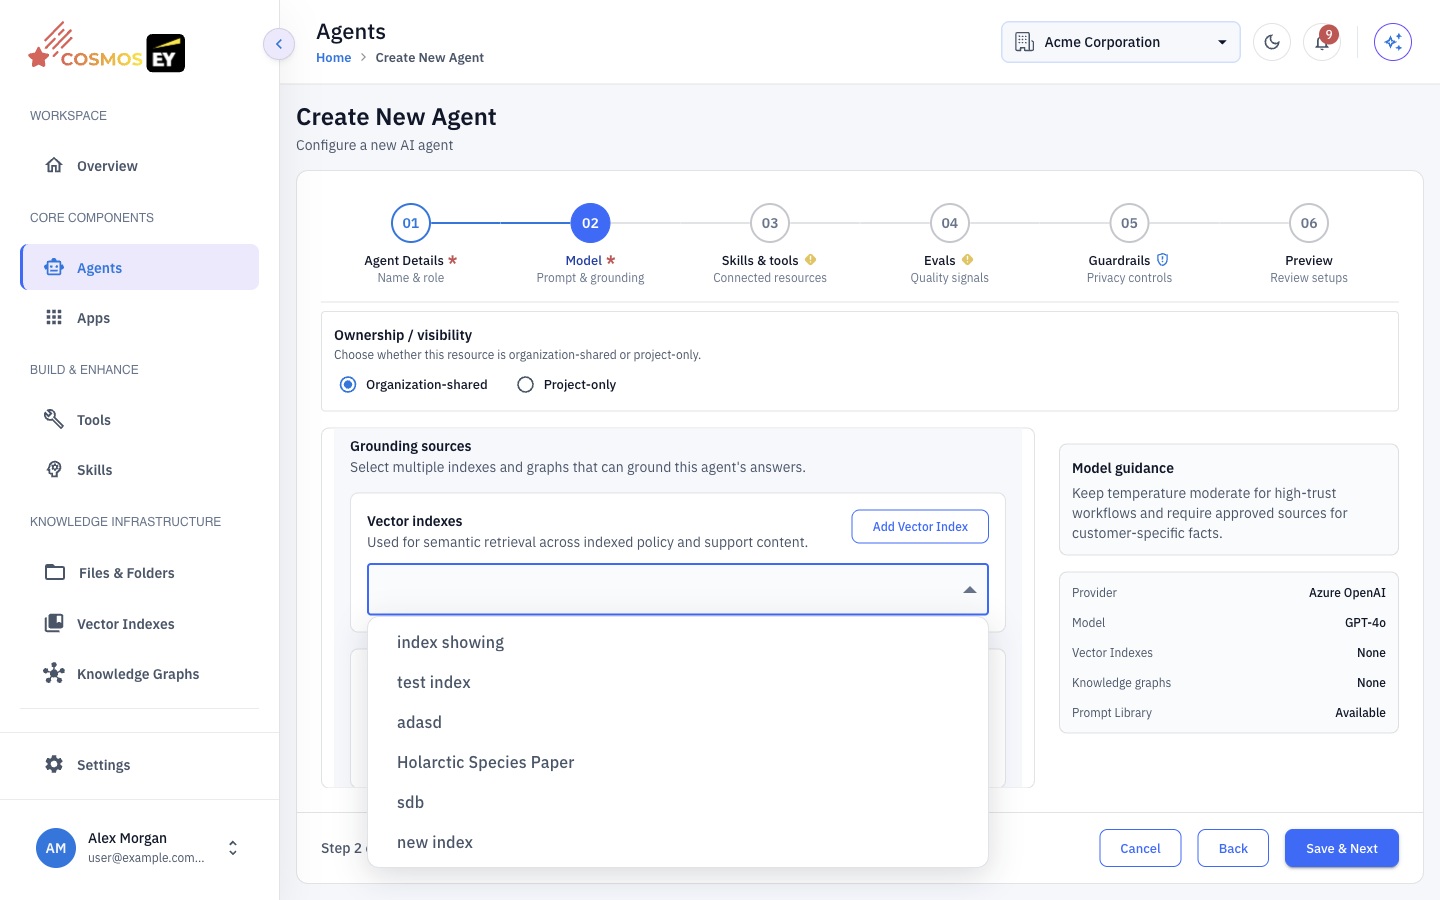
You can attach several indexes to one agent. The agent searches all of them.
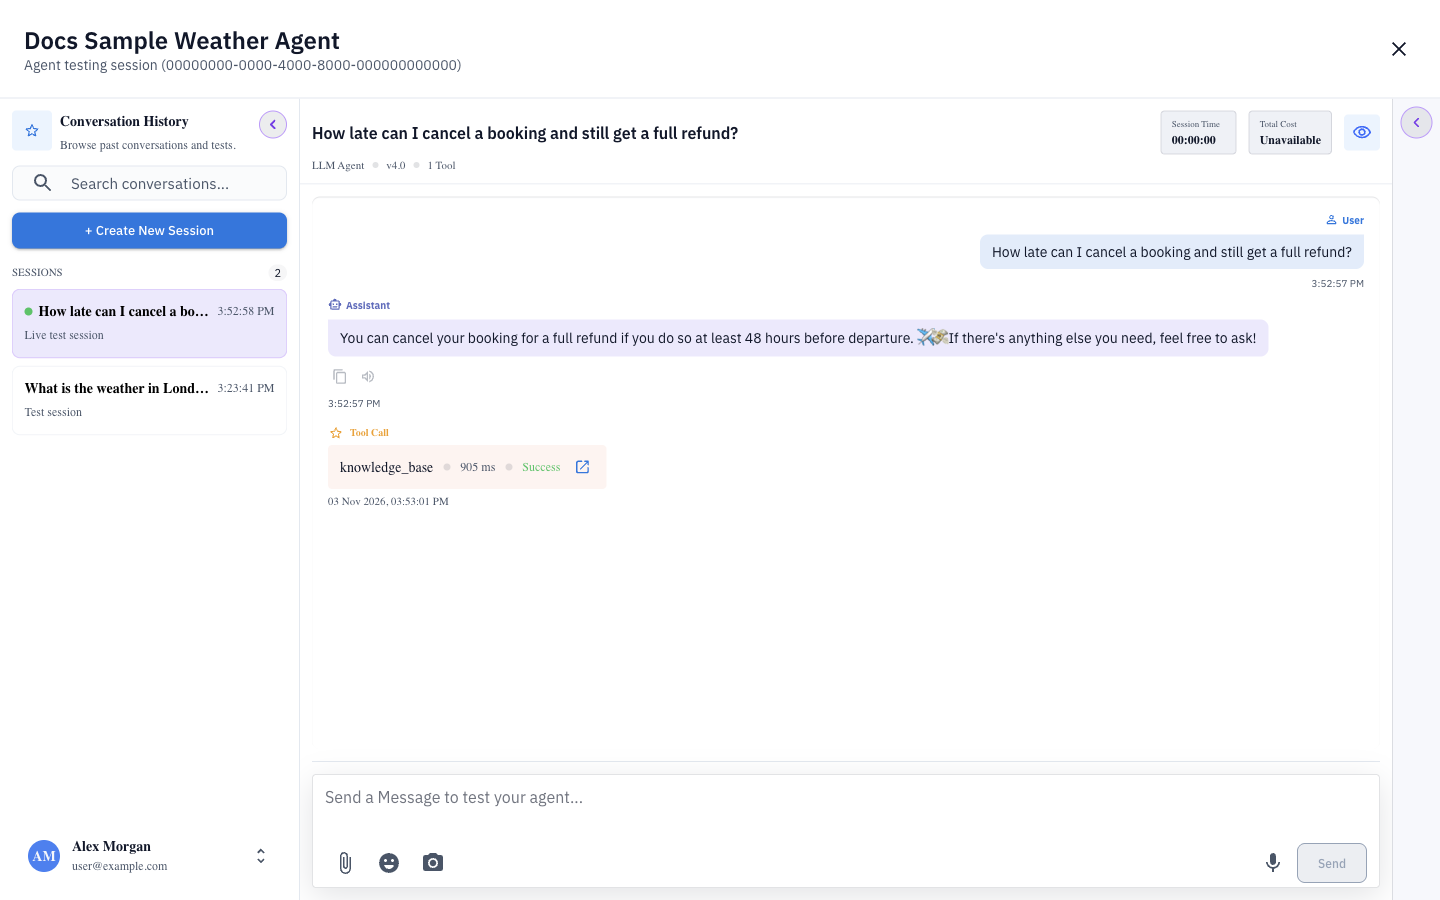
Step 7: Test the agent
Open the agent and click Test. Ask a question your documents answer, for example "What are the system requirements for version 3.0?" Check the answer against the source document.
Managing Vector Indexes
From an index's actions you can View, Rename, Re-index, Evaluate, open Evaluation History, or Delete it.
- Change the sources: open the index and click Update Files, then re-index.
- Re-index after you add, remove, or update files, change the embedding model or parsing strategy, or fix the cause of a failure. Re-indexing rebuilds the whole index.
- Evaluate to check how well the index retrieves the right passages.
- Compare with Graph to compare answers from a vector index and a knowledge graph over the same files.
Knowledge Graphs
A knowledge graph extracts entities (such as people, products, or places) and their relationships from your files. It helps with questions that depend on how things are connected.
- Open Knowledge Graphs and click Create Knowledge Graph.
- Choose the source files and fill in:
- Embedding Provider and Embedding Model
- LLM Provider and LLM Model, used to extract entities
- Graph Store
- Parsing Strategy
- Extraction Prompt, to guide what is extracted. Cosmos can suggest entity types for your documents.
- Create the graph and wait for it to finish.
After the graph is built you can Visualize it, Review Entity Types, Evaluate it, and Compare with Index.
How Search Works
When an agent searches an index, Cosmos can use:
- Vector search — finds passages whose meaning is closest to the question.
- Keyword search — matches exact terms.
- Hybrid search — combines both for better results.
Tips & Best Practices
- Keep indexes focused. A small set of relevant documents works better than a large mixed set.
- Use descriptive file names. File names are stored with the chunks and help search.
- Prefer digital text over scans. If you must use scans, choose OCR Required.
- Test after attaching. Ask several questions to check that the agent finds the right passages.
- Re-index after updates. Indexes do not pick up file changes automatically.
- Watch the chunk count. An unusually low count often means a parsing problem; try another parsing strategy.