Apps & Publishing
Guide to creating, configuring, testing, and publishing Cosmos apps for end users
Updated 2026-11-03
Verified 2026-11-03
Overview
An app puts a deployed agent in front of end users on a communication channel: Chat, Voice, Email, or WhatsApp. The app holds the channel settings, the guardrails, and the agent version to use.
The usual build order is Tools → Agent → App.
Prerequisites
- A deployed agent with Orchestrator agent turned on, to act as the app's orchestrator agent. See Building & Testing Agents.
- Permission to create apps. If Create New is not available on the Apps page, ask your organization admin.
- For voice, email, and WhatsApp channels: provider credentials configured for your organization. See Bring Your Own Token.
Creating an App
Step 1: Open Apps
In the sidebar, under Core Components, click Apps. The page lists your Communication Channels, or Apps in <project> when a project is selected.
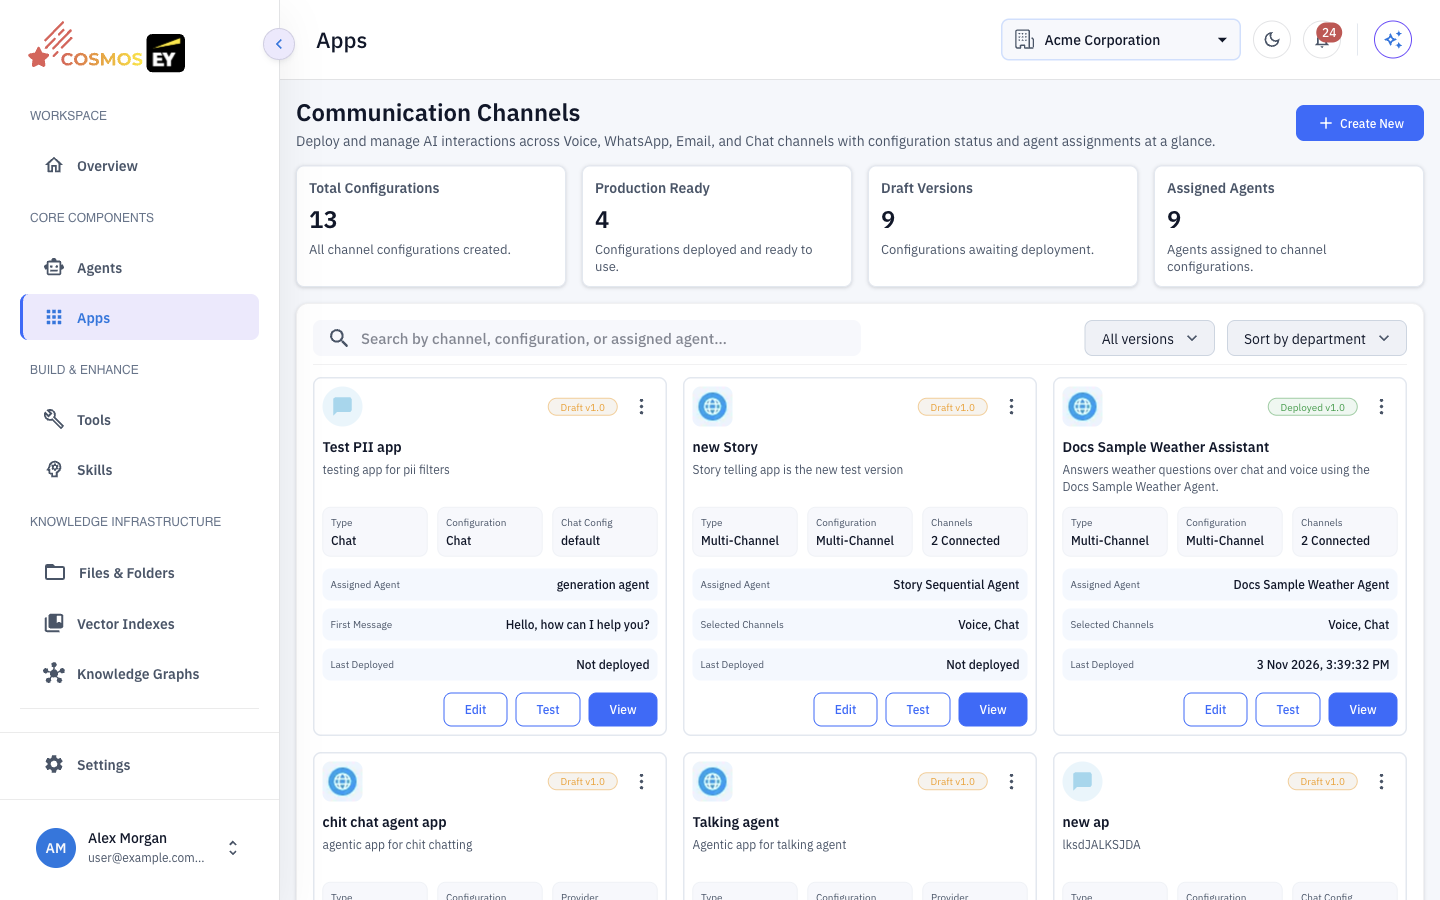
Step 2: Name the app and pick a channel
Click Create New. In the Create Channel Configuration dialog:
- Enter the App Name.
- Under Select Communication Channel, choose Voice, WhatsApp, Email, or Chat.
- Click Submit.
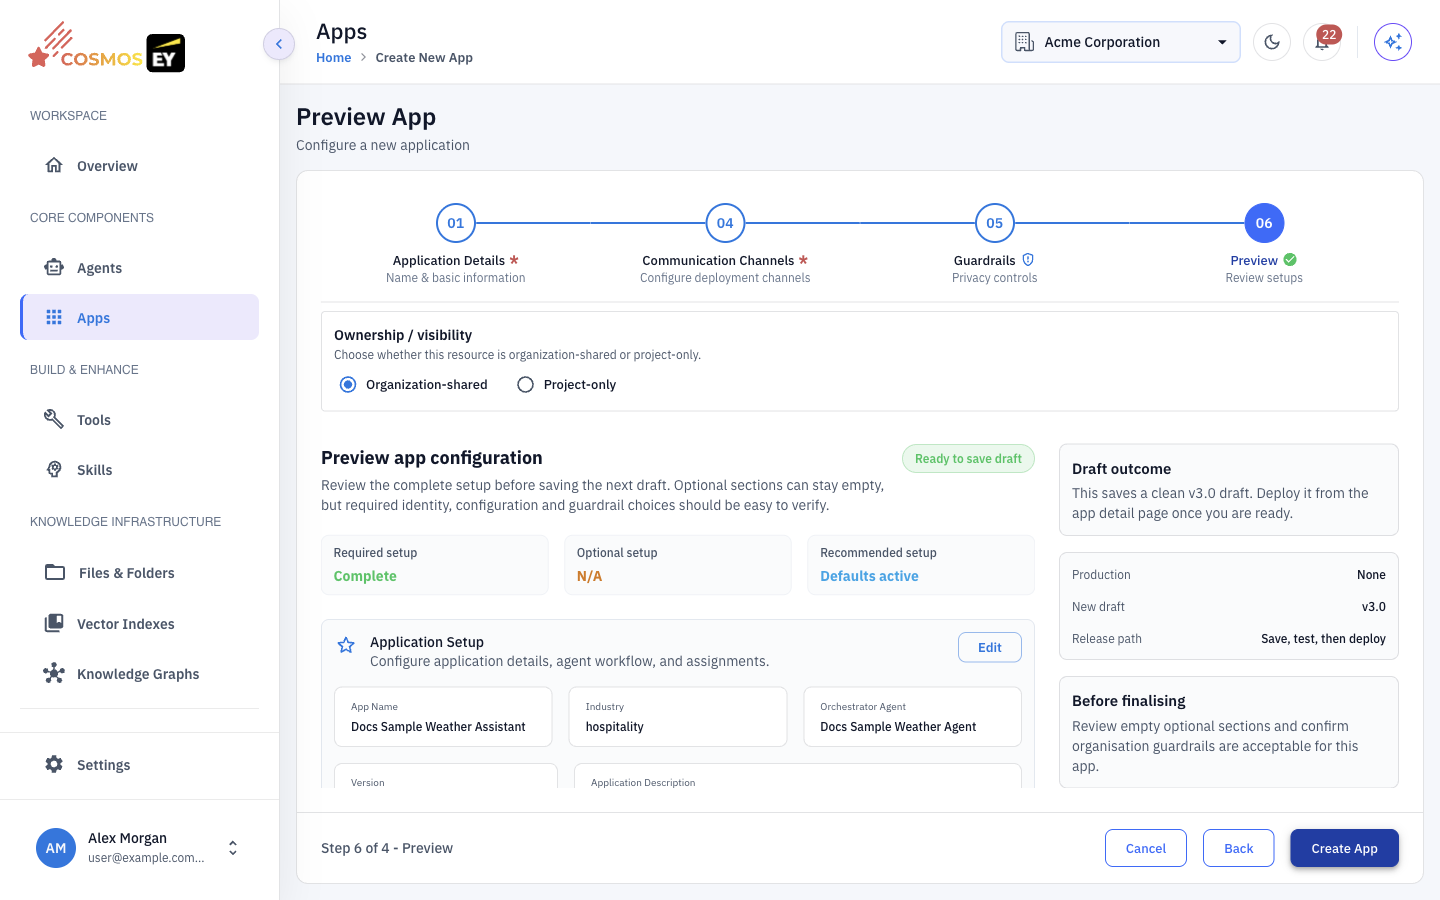
The app wizard opens with four steps: Application Details, Communication Channels, Guardrails, and Preview.
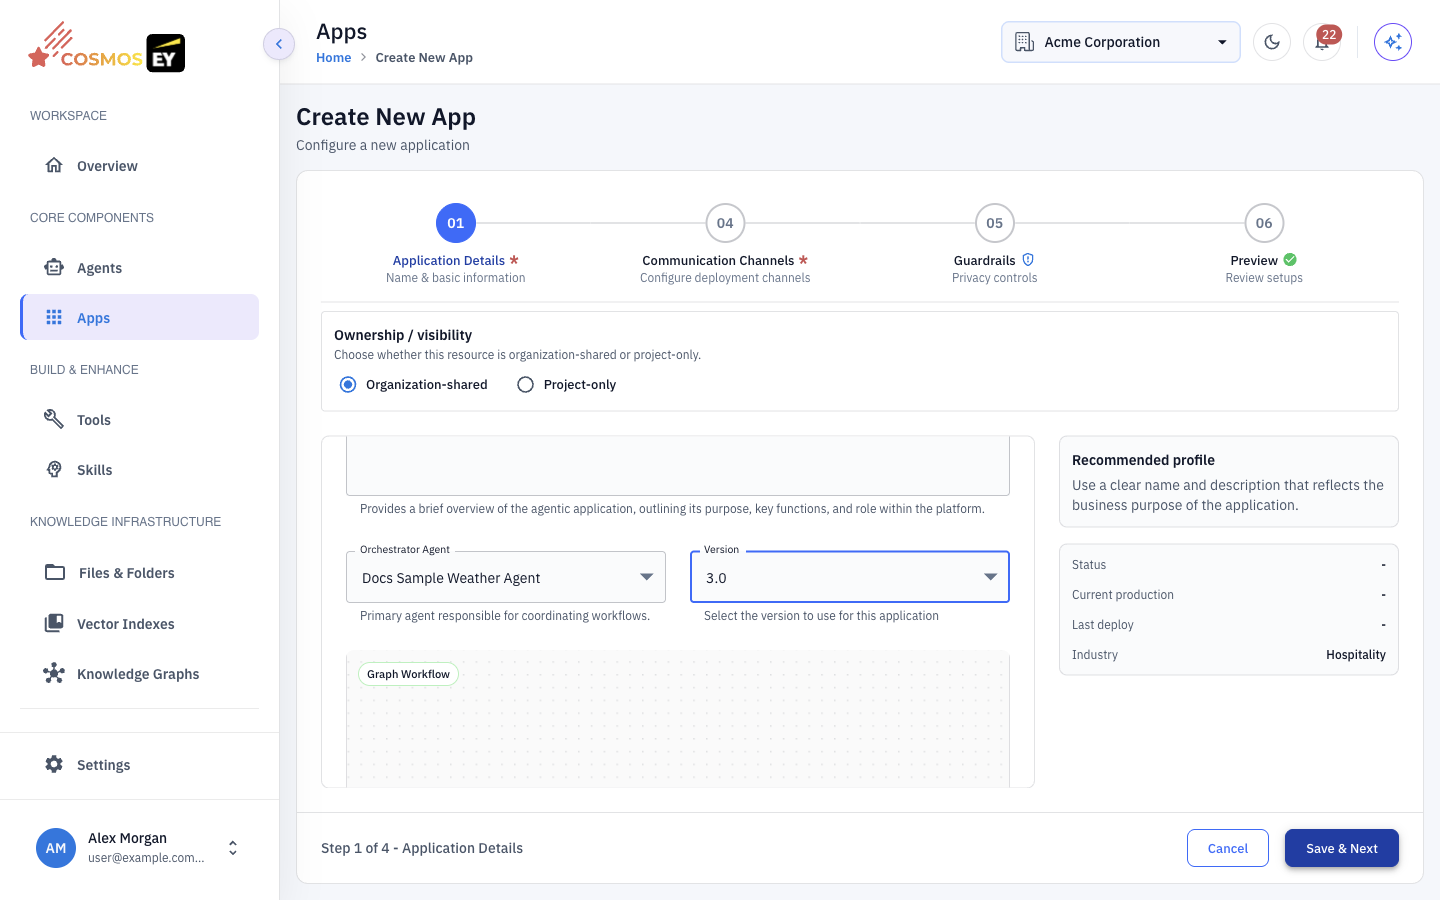
Step 3: Application Details
| Field | Description |
|---|---|
| App Name | The display name of the app. |
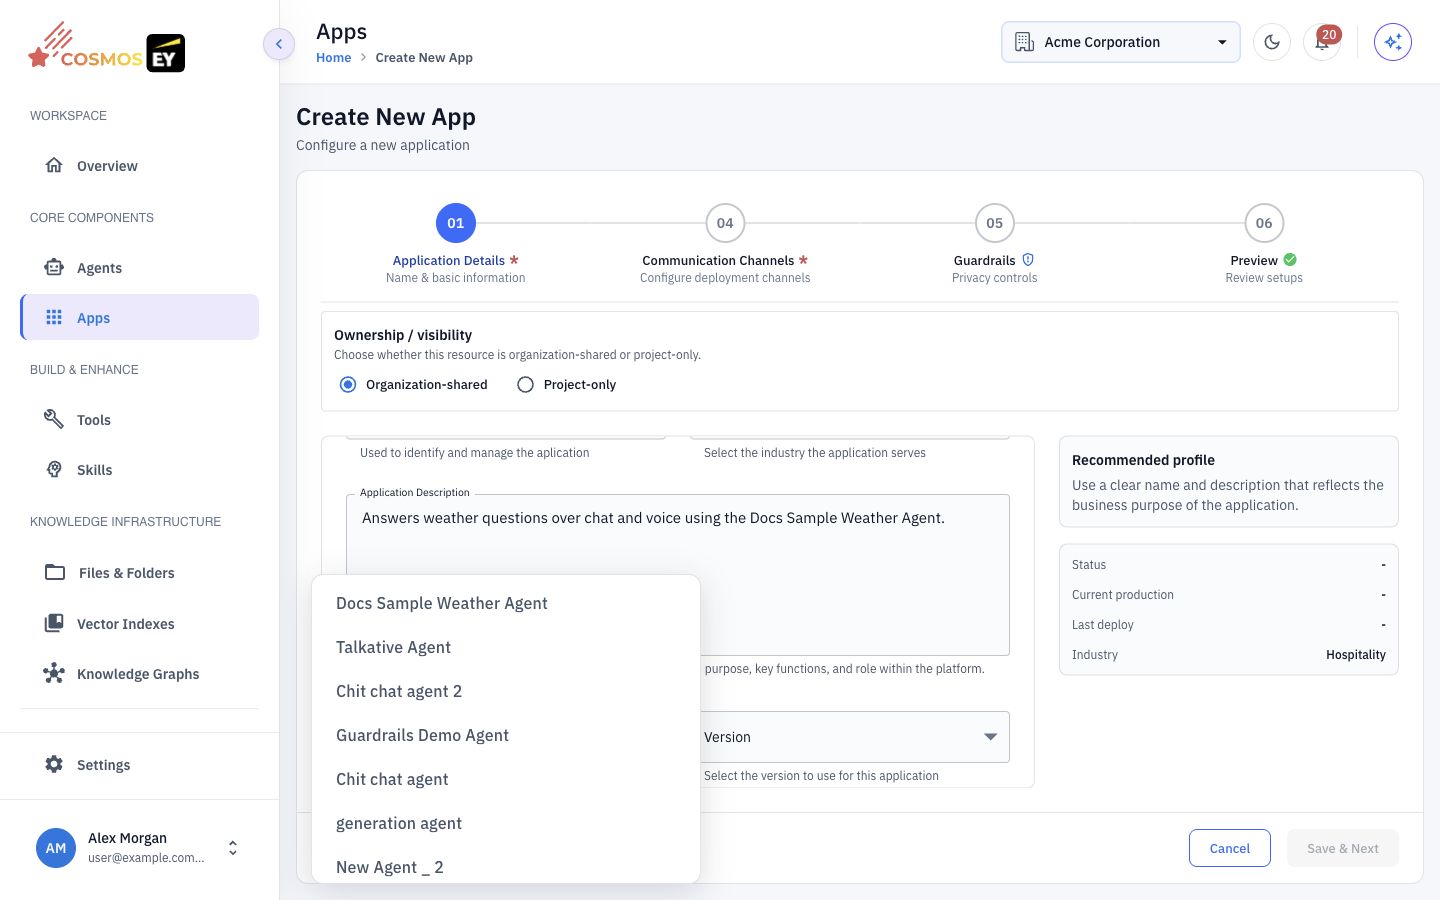
| Application Description | A short summary of what the app does. |
| Industry | The business domain, such as healthcare, finance, or retail. |
| Orchestrator Agent | The deployed agent that powers the app. Only deployed agents with Orchestrator agent turned on are listed. |
| Version | The deployed version of that agent to use. |
If a newer version of the selected agent has been deployed, the app's detail page shows a banner with Go to Edit to Upgrade.
Step 4: Communication Channels
Configure the channel you chose.
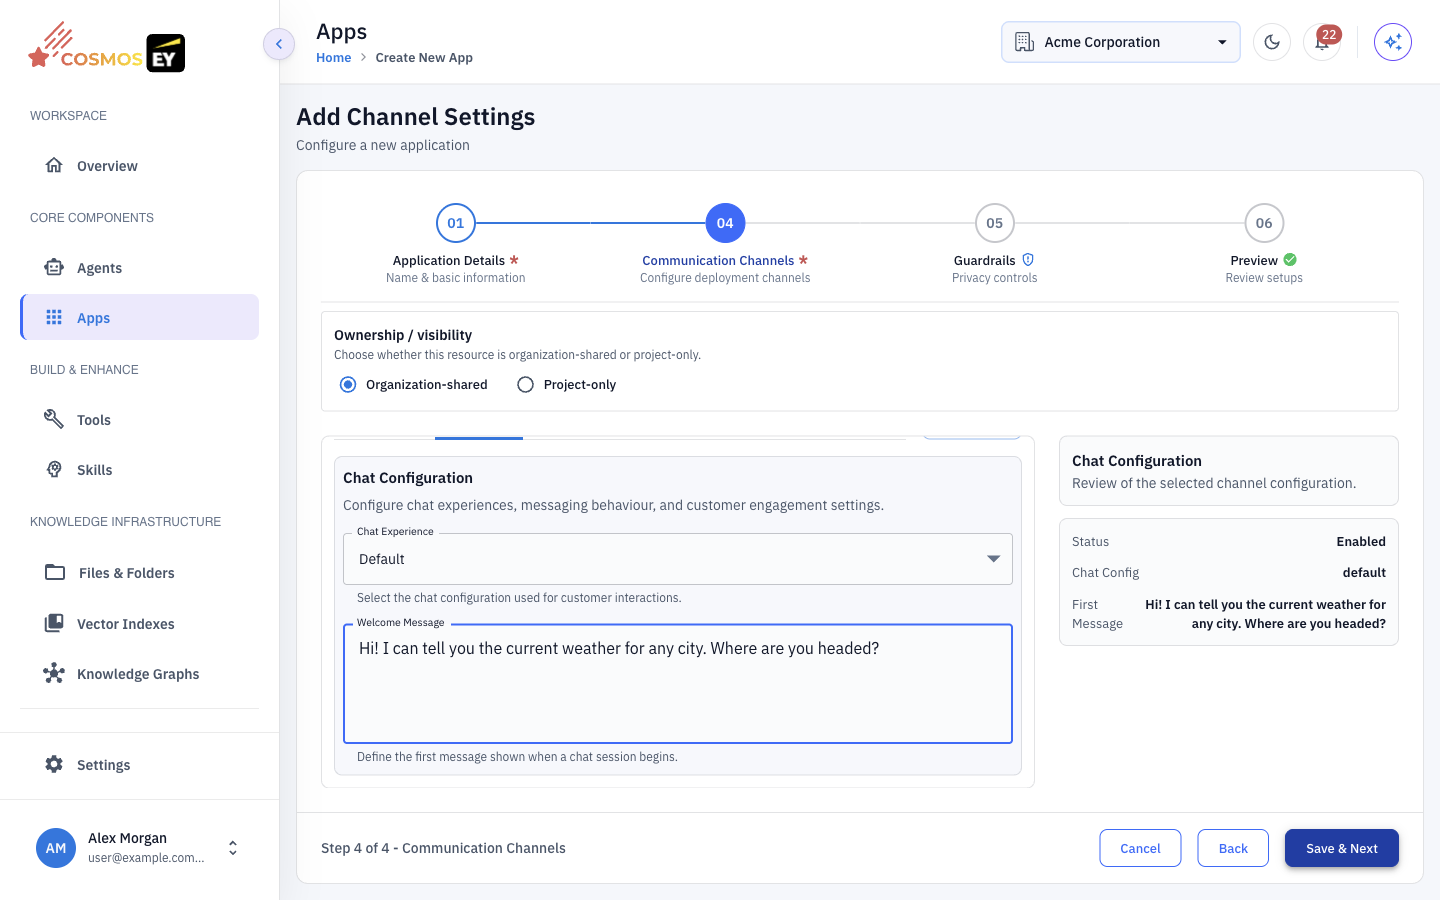
Chat
- Chat Experience — the chat layout. Default is the standard layout.
- Welcome Message — the greeting shown when a user opens the chat, for example "Hello! How can I help you today?"
Voice
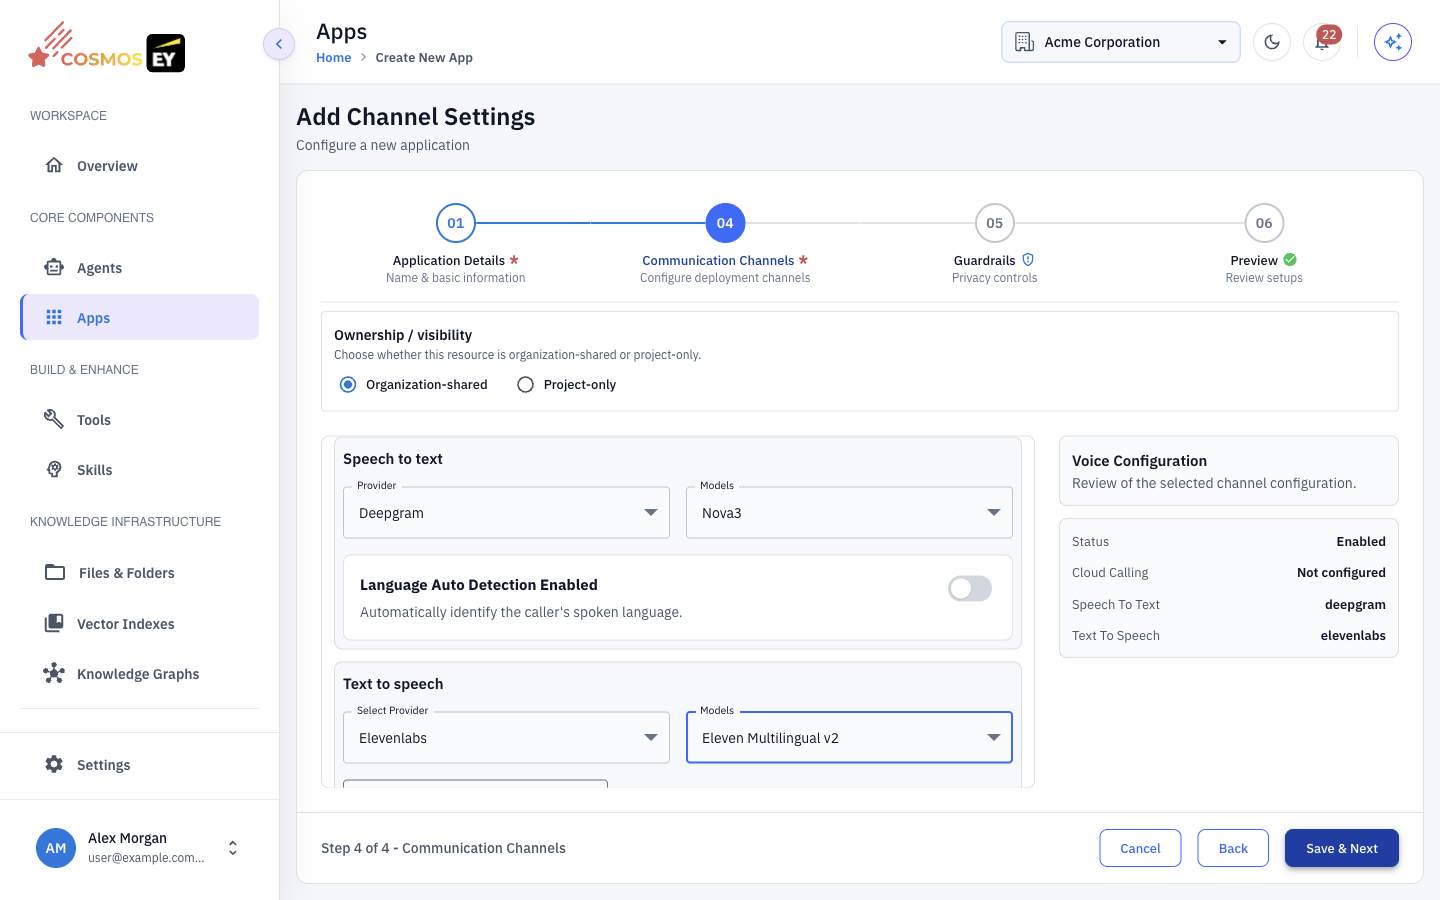
Voice apps need speech providers and, for phone calls, a calling provider:
| Setting | Description |
|---|---|
| Cloud Calling | Telephony provider. Needed only for phone calls. |
| Speech to text | Provider and model that turn the caller's speech into text. |
| Text to speech | Provider, model, and voice for the agent's spoken replies. |
| Audio Enhancement | Background audio (with loop and volume) and noise cancellation. |
| First Message | What the agent says when a call connects. |
You can also tune speech detection, turn-taking, interruptions, idle prompts, and call duration, and listen to a Voice Preview. See Voice Agents.
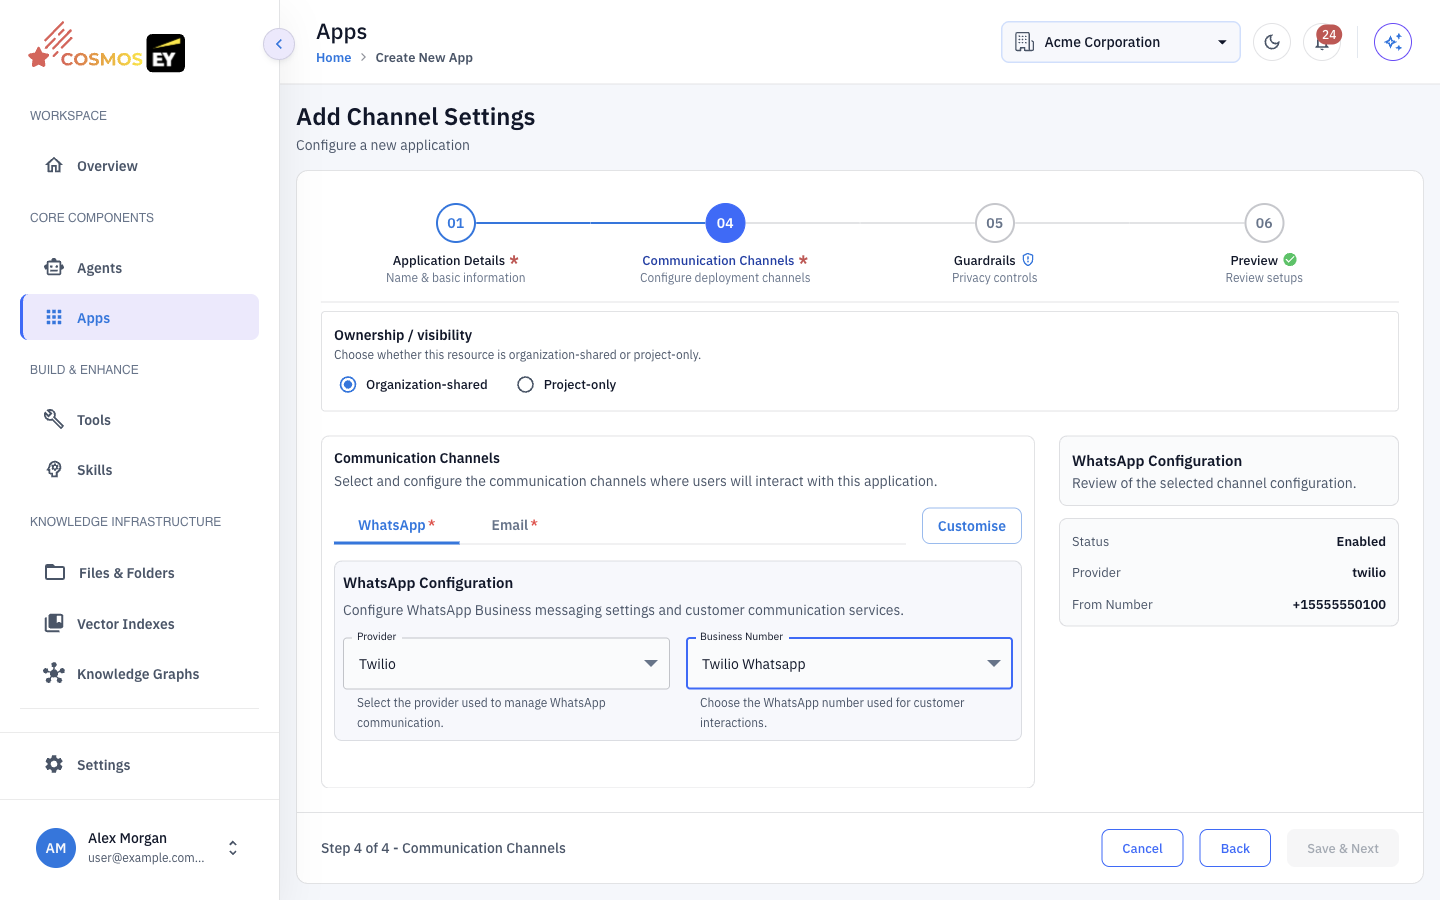
- Provider — a WhatsApp Business provider configured for your organization.
- Business Number — the WhatsApp business number the app sends from. Choose it from the numbers configured for the selected provider.
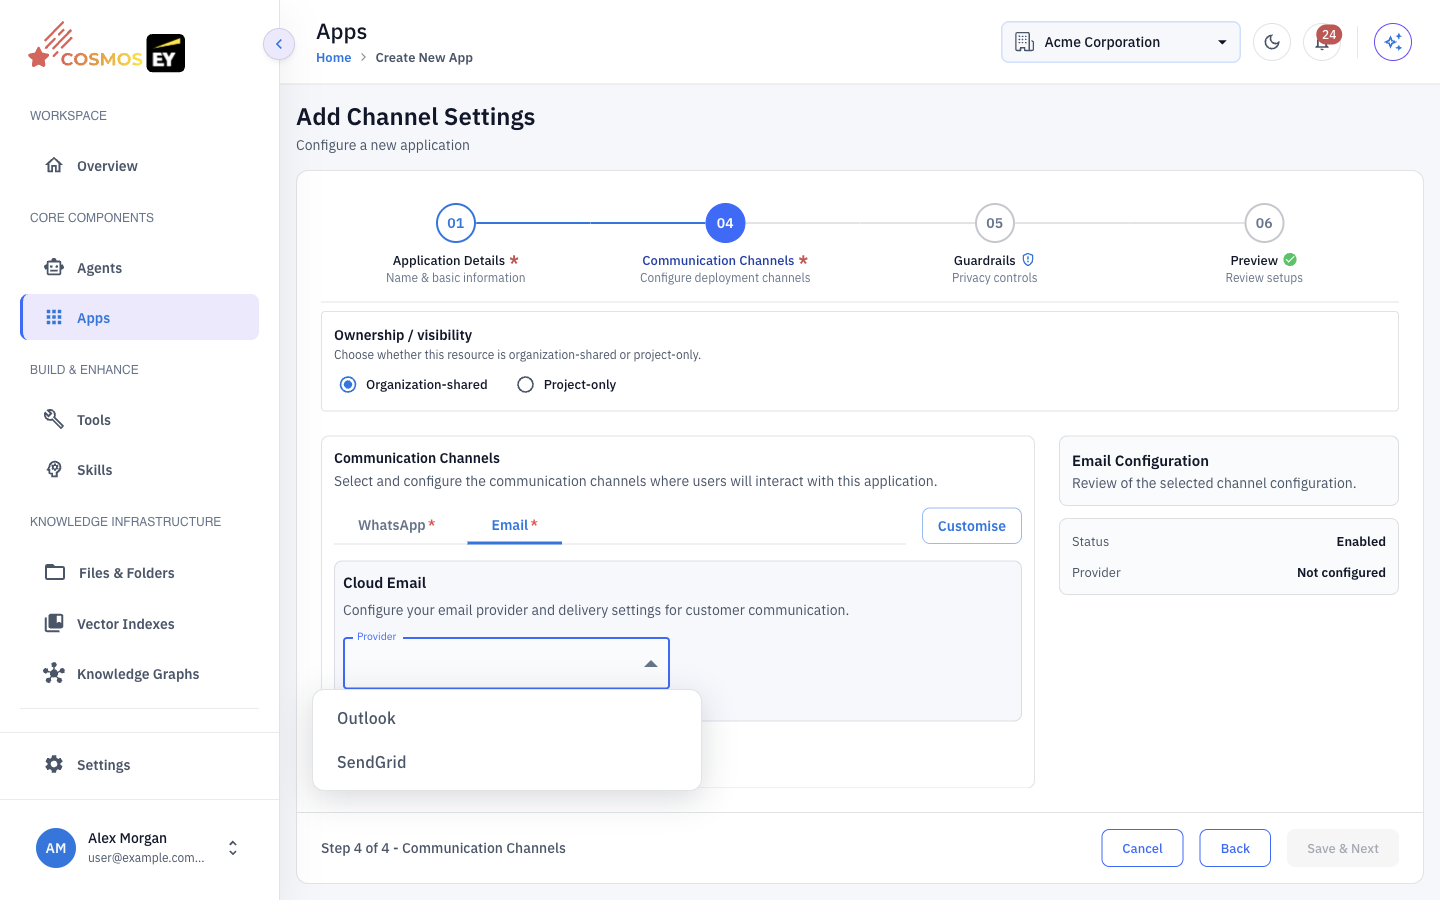
- Cloud Email provider — an email provider configured for your organization. Provider-specific fields appear after you choose it.
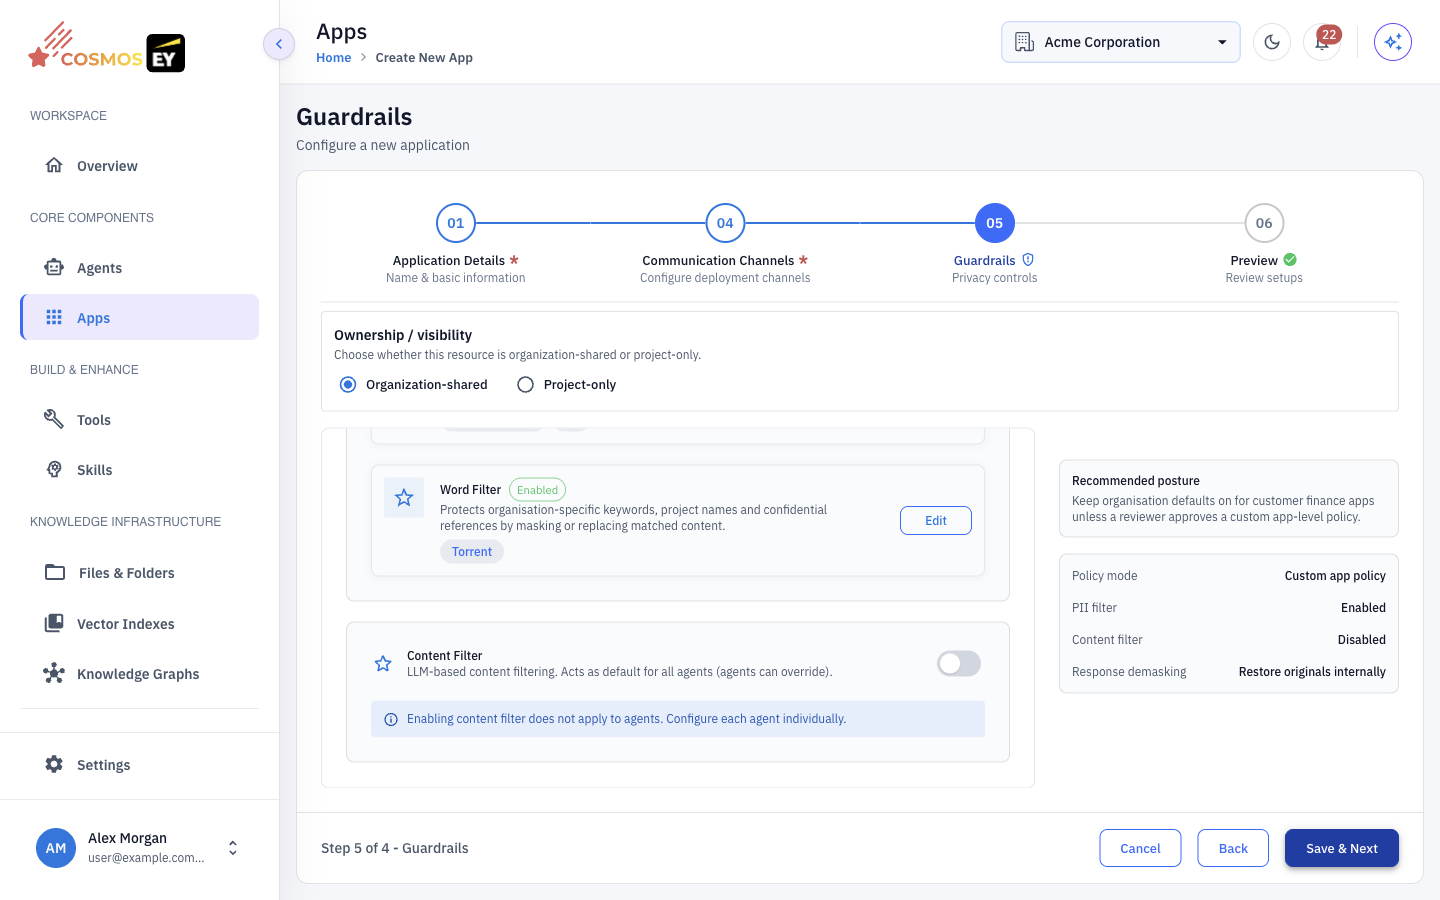
Step 5: Guardrails
Choose the app's PII protection and content safety. You can keep the organization defaults or set app-specific rules.
⚠️ Enabling PII on an app applies to every agent in the app.
Step 6: Preview and save
Review the full configuration on Preview and save. The app is saved as a Draft.
Testing an App
On the app's detail page, click Test. In the Choose a test mode dialog, pick:
- Test Chat — chat with the app in the browser.
- Test Call — call the app. The voice test has two tabs: WebCall for a browser call and TeleCall for a phone call. Click Test Call to start.
The voice console shows the Conversation, call Metrics, and Events, plus device controls and a keypad for tones. See Voice Agents.
Deploying and Versions
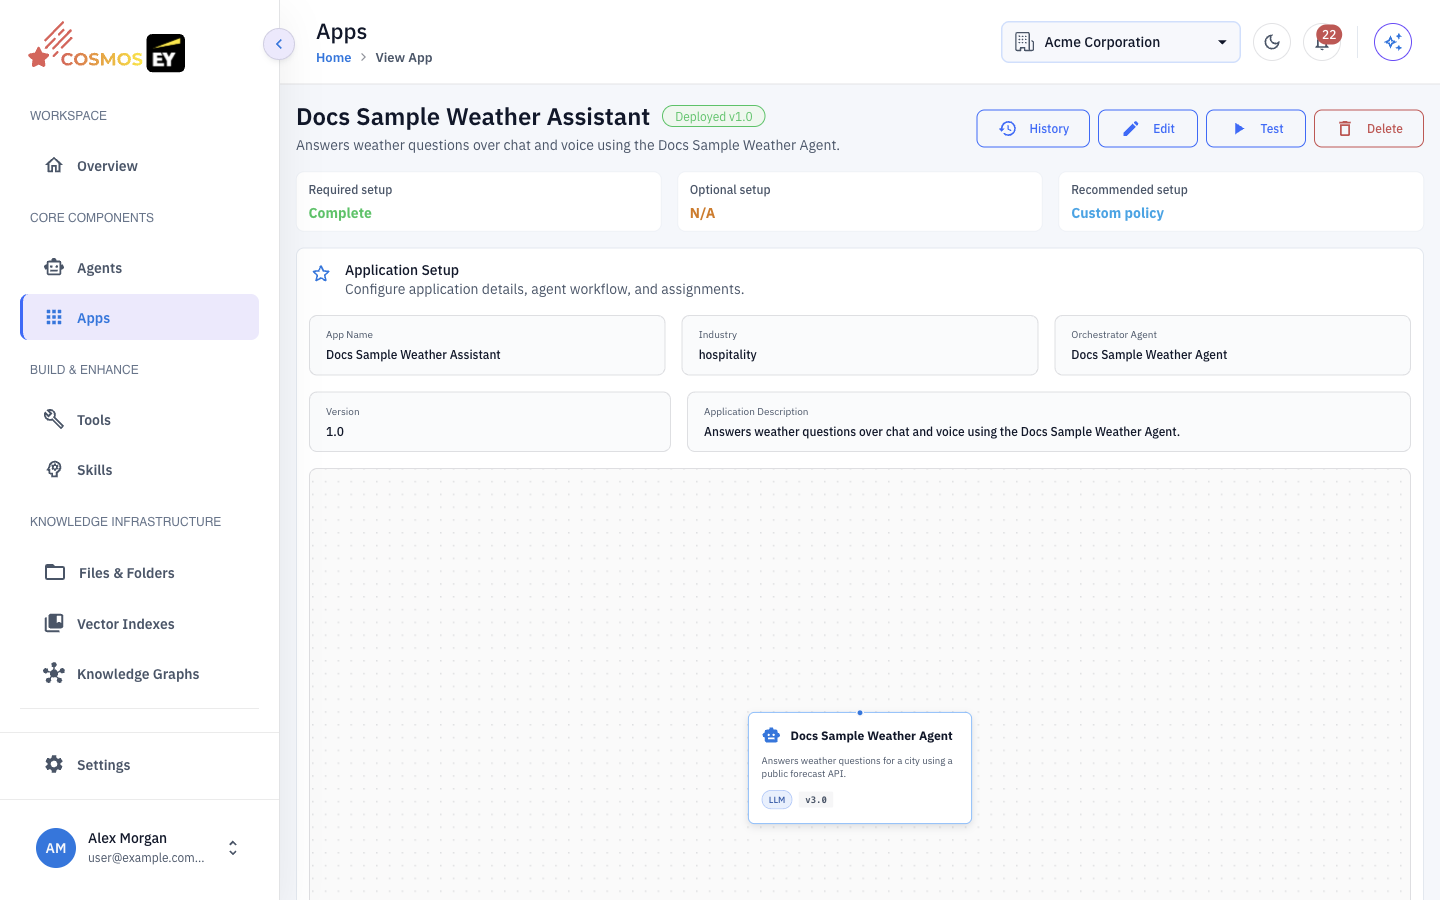
The app detail page has History, Edit, Test, Deploy, and Delete.
-
Click Deploy to publish the current draft. Deployment makes the app available on its channel.
-
To change a deployed app, click Edit, make your changes, and save. The changes become a new draft until you deploy again.
-
Click History to browse earlier versions.
Updating the agent version
After you deploy a new agent version, the app's detail page shows a banner when a newer agent version is available. Click Go to Edit to Upgrade (or Edit), choose the new version in Version on the Application Details step, save, and deploy the app again.
Deleting an app
Click Delete on the detail page and confirm. Deleting removes the app and all its versions, so make sure end users no longer rely on it.
Sharing an App
Once deployed, an app is identified by an app code that channel integrations and the chat interface use. Ask your administrator how the app's chat link or embed is published in your environment.