Building & Testing Agents
Step-by-step guide to creating, configuring, testing, and deploying AI agents in Cosmos
Updated 2026-11-03
Verified 2026-11-03
An agent is an AI assistant that follows your instructions, uses the tools and knowledge you connect to it, and answers questions or completes tasks for your users. Agents are the building blocks of every Cosmos app.
Overview
Cosmos has two kinds of agent:
| Agent type | Use it when |
|---|---|
| LLM Agent | You want one model-driven assistant with a system prompt, tools, skills, and grounding sources. Most agents are LLM agents. |
| Workflow Agent | You want to coordinate several deployed agents in a defined flow, such as a graph of steps. |
Every agent moves through the same lifecycle: create a draft, test it, deploy a version, and then use the deployed version in apps or as a sub-agent of another agent.
Prerequisites
- A Cosmos account with access to an organization and permission to create agents. If Agents is missing from the sidebar, ask your organization admin for access.
- At least one model provider configured for your organization. See Bring Your Own Token.
- Optional: deployed tools, skills, vector indexes, or knowledge graphs that you want the agent to use. Agents can only attach deployed tools and sub-agents.
Step-by-Step: Create an LLM Agent
Step 1: Open Agents and choose an agent type
- In the sidebar, under Core Components, click Agents. The list shows All Available Agents, or Agents in <project> when a project is selected in the workspace selector.
- Use the search box, the status filter (All versions, Deployed, Draft), and the sort control to find existing agents.
- Click Create New. The Choose Agent Type dialog opens.
- Select LLM Agent.
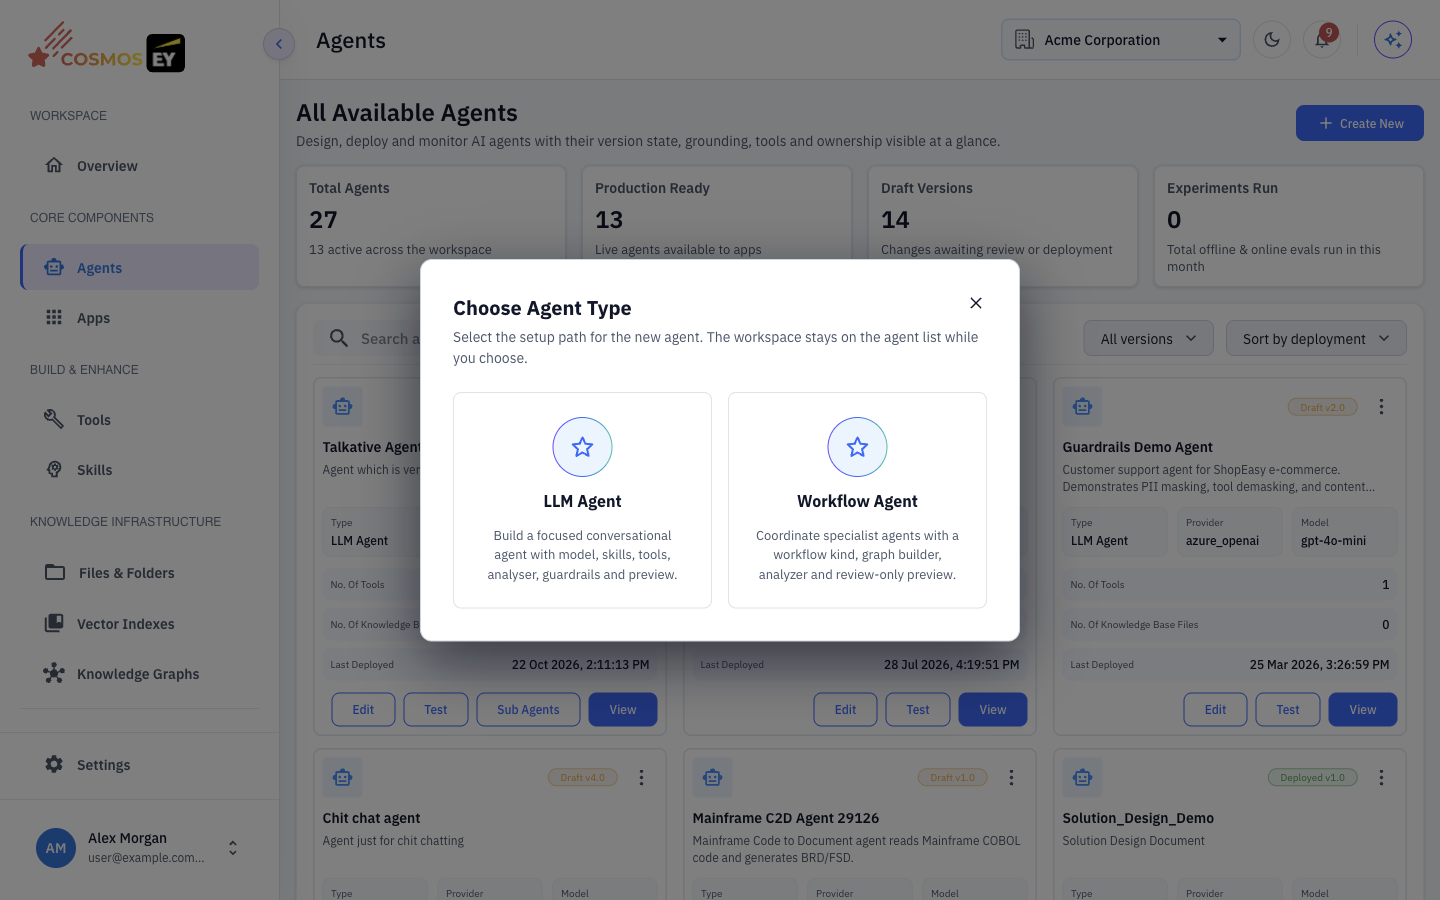
The LLM agent wizard has six steps: Agent Details, Model, Skills & tools, Evals, Guardrails, and Preview.
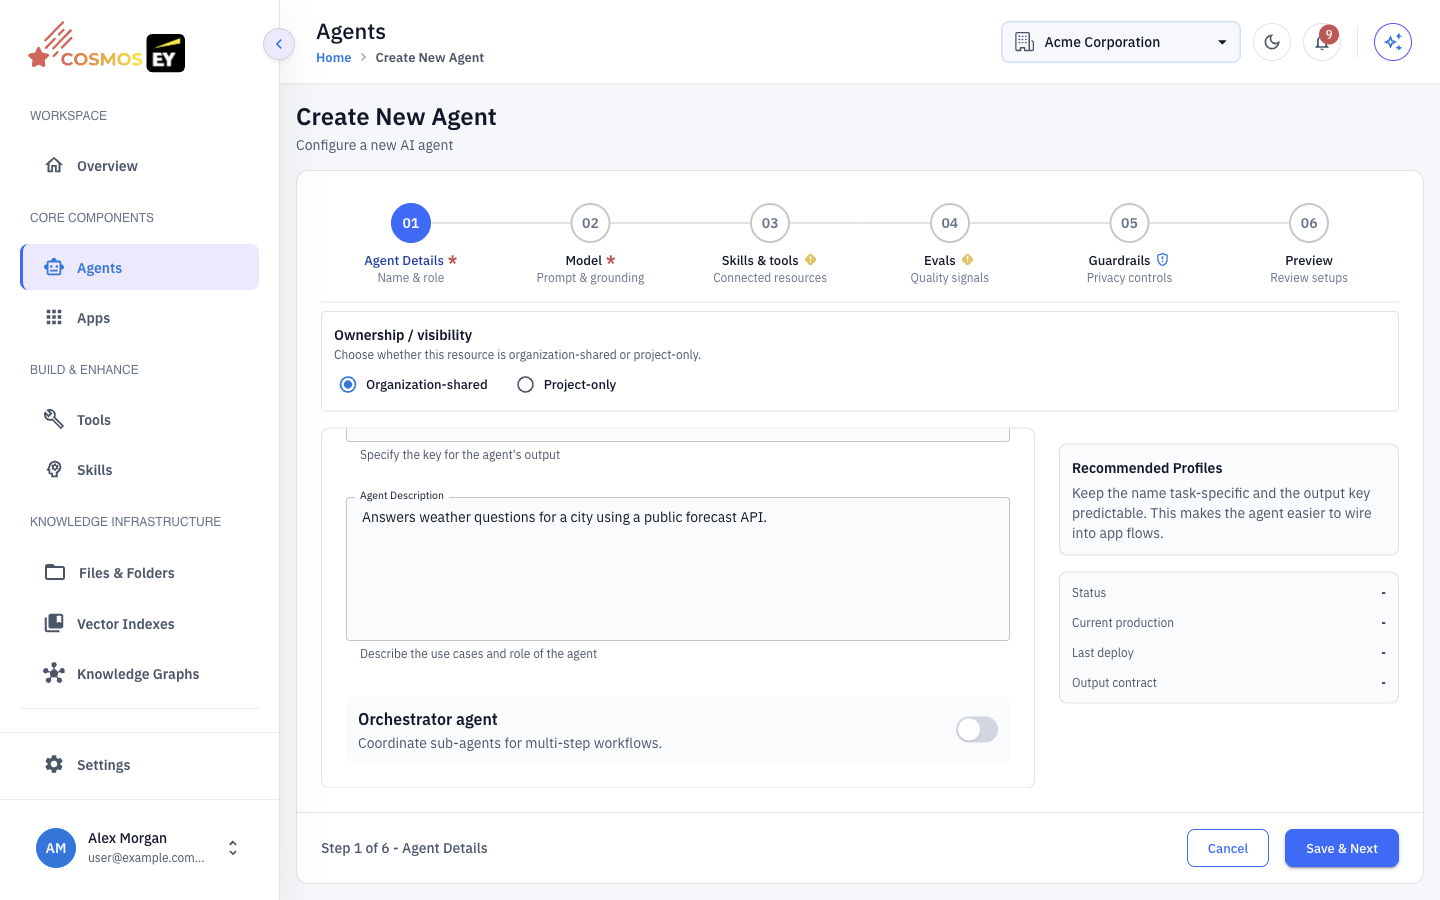
Step 2: Agent Details
| Field | Description |
|---|---|
| Agent Name | A unique, descriptive name for the agent. |
| Agent Description | What the agent does. Other agents and reviewers read this to understand its role. |
| Orchestrator agent | Turn this on when this agent should delegate work to other agents. You can then click Add Sub Agent and choose from Select Deployed Sub-Agents. |
| Ownership / visibility | Choose Organization-shared to make the agent available across the organization, or Project-only to keep it inside the current project. |
Step 3: Model
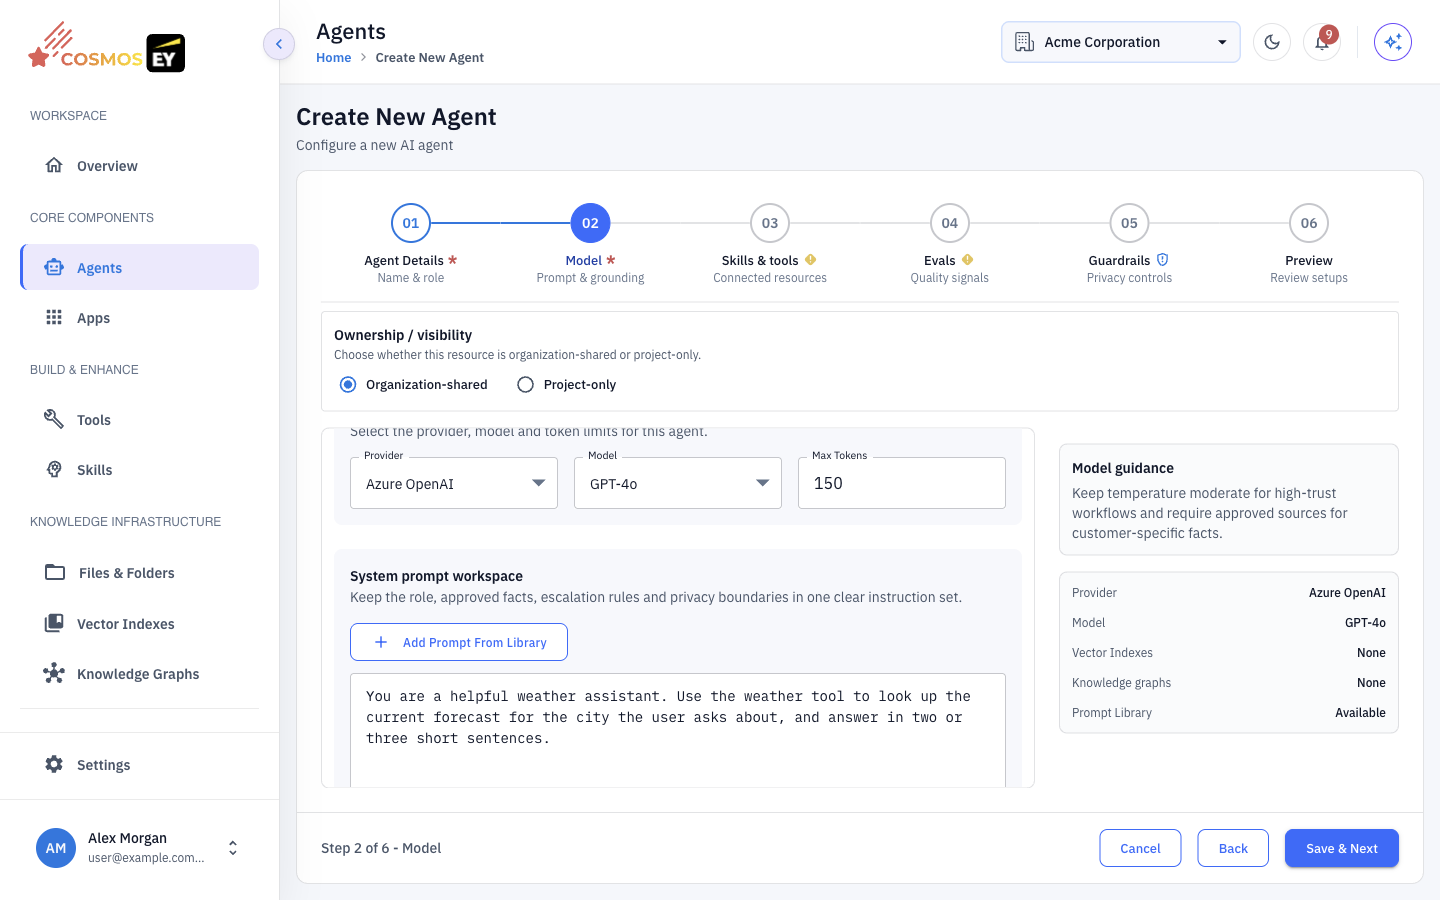
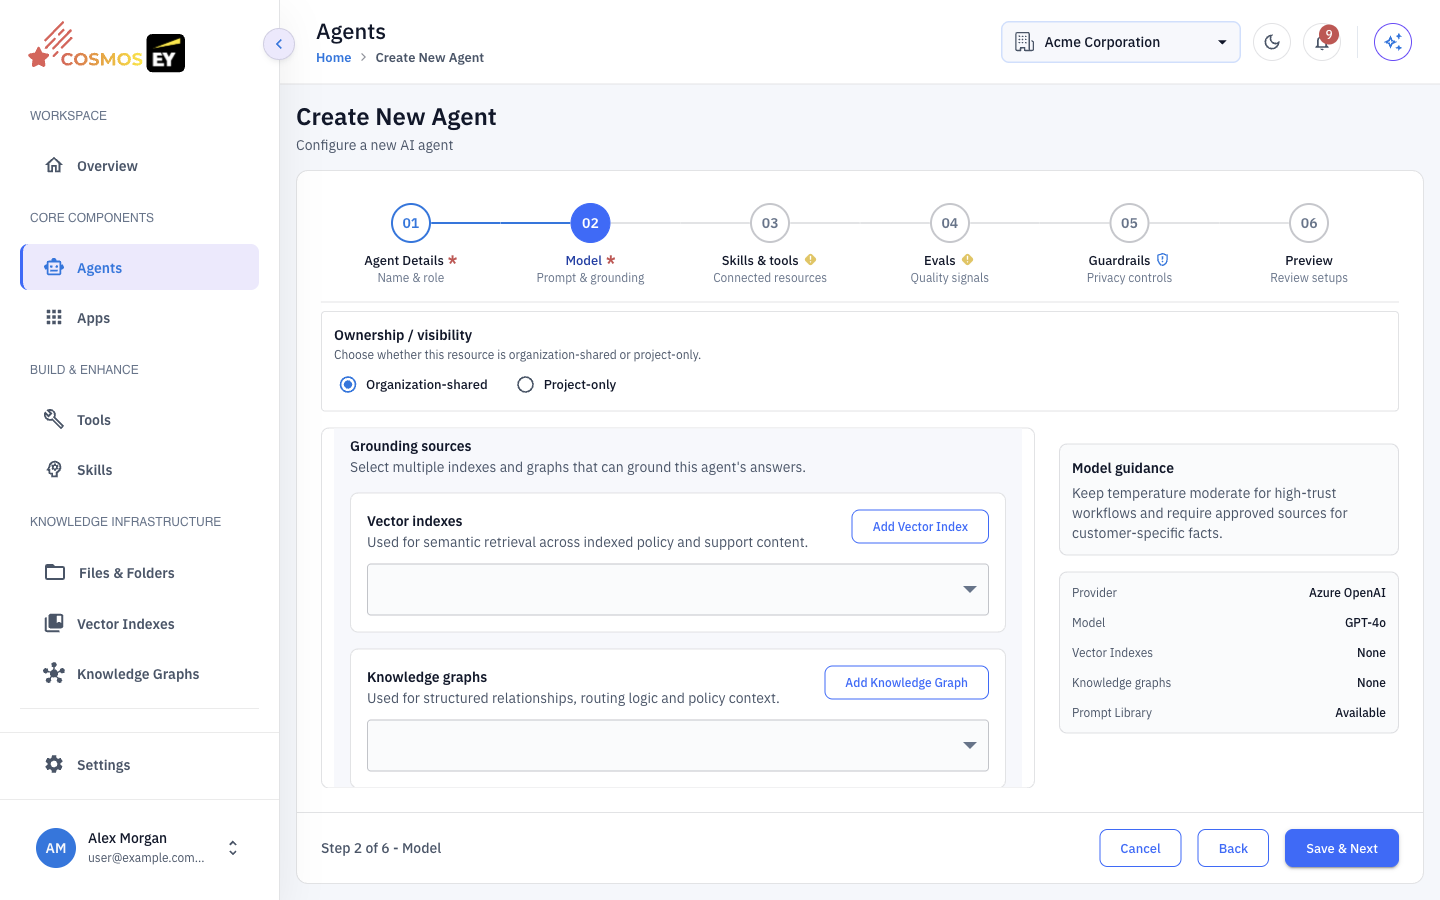
The Model step sets the prompt, the model, and the grounding sources.
- Select a Provider and a Model. Only providers configured for your organization are listed.
- Write the System Prompt, or click Add Prompt From Library to start from a saved prompt.
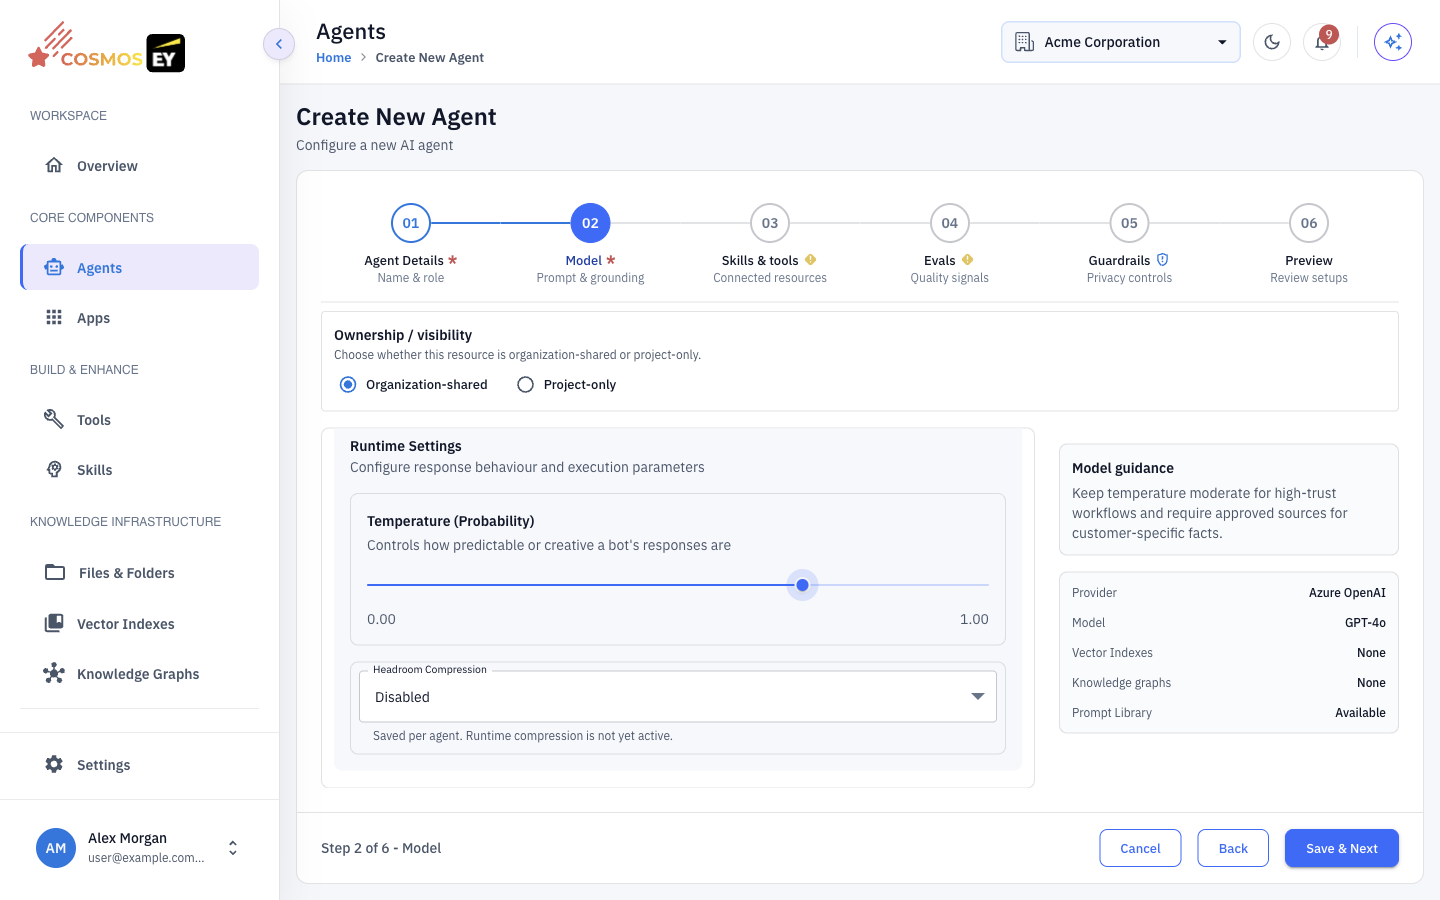
- Adjust the generation settings:
| Setting | Description |
|---|---|
| Max Tokens | Maximum length of each response. |
| Temperature | Lower values give focused, consistent answers; higher values give more varied answers. |
| Thinking / Effort | Reasoning effort, for models that support it. |
| Context Size | How much conversation history the agent keeps. |
| Compaction Interval | How often older context is summarized to save tokens. |
| Overlap Size | How much recent context is kept when compacting. It must be smaller than the compaction interval. |
| Headroom Compression | Saved with the agent. The screen notes that runtime compression is not yet active. |
- Under grounding sources, click Add Vector Index or Add Knowledge Graph to let the agent search your documents. See Knowledge Base & Document Indexing.
A good system prompt is specific about the agent's role, its rules, and when to use each tool:
You are a customer support assistant for Acme Corp. You help customers
check order status, request returns, and answer product questions.

Rules:
- Use the order lookup tool before answering questions about an order.
- Never share internal pricing or discount codes.
- If you cannot resolve an issue, offer to escalate to a human agent.
Step 4: Skills & tools
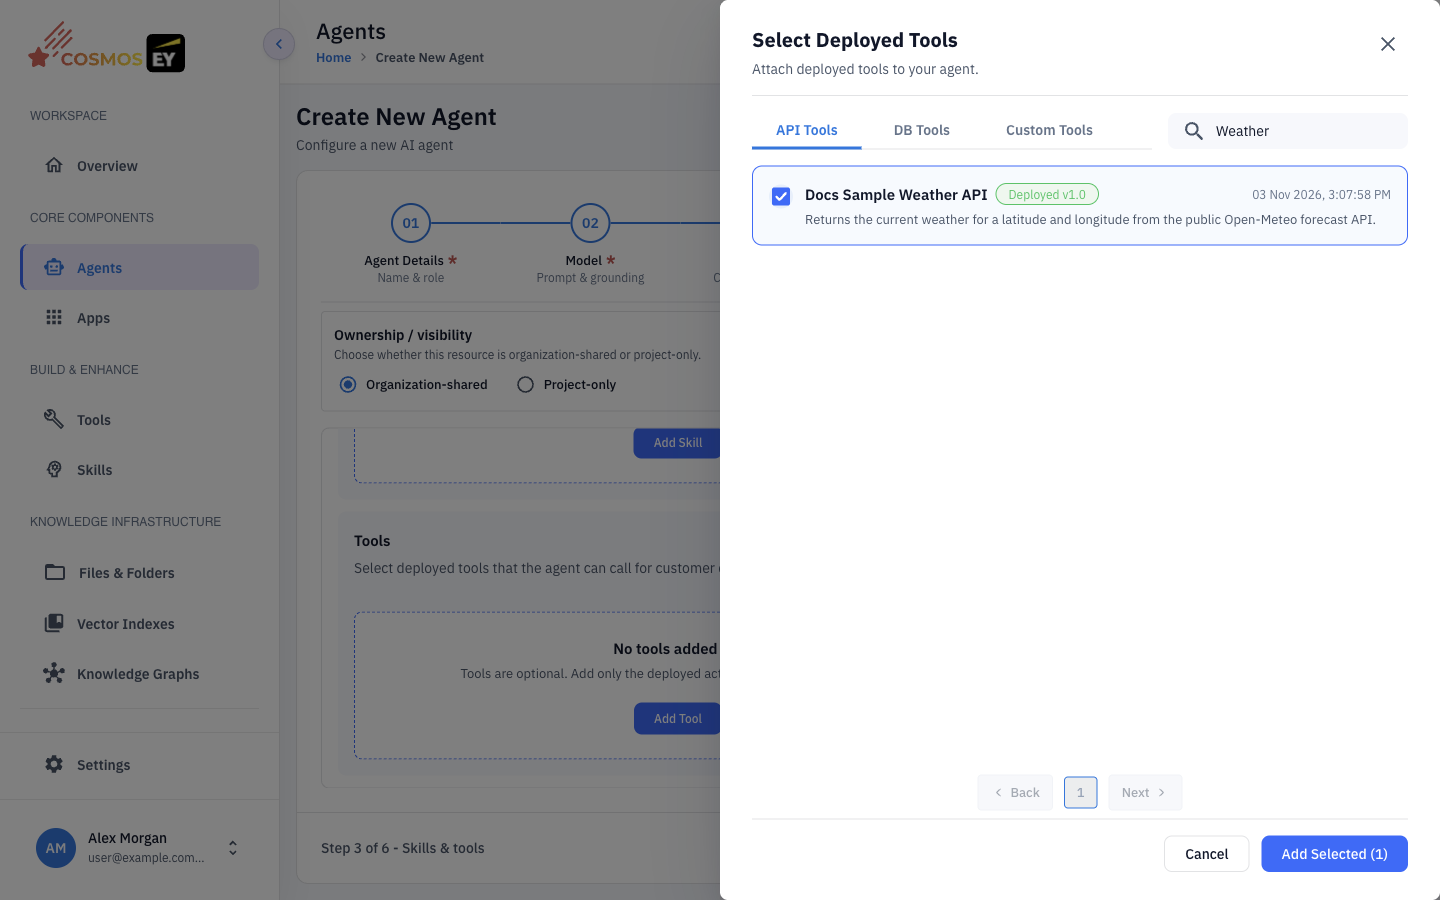
- Click to open Select Deployed Tools. Tools are grouped into API, DB, and Custom Tools tabs.
- Select the tools the agent may call.
- Open Select Skills to attach reusable skills. See Skills.
The agent decides when to call each tool based on the user's request, the tool description, and your system prompt.
Step 5: Evals (optional)
Attach quality checks that run on live conversations:
- Attach Eval Agent — choose a deployed eval agent to score conversations.
- Triggers / Sampling strategy — Random, Errors first, or All sessions.
- Verdict threshold — the score below which a session is flagged.
- Live evaluation — turn scoring of live sessions on or off.
See Evals for how to build eval agents and datasets.
Step 6: Guardrails
Set the agent's privacy and safety controls: Policy mode, PII filter, Response demasking, and Content filter. See PII Masking & Guardrails.
Step 7: Preview and save
Review the complete configuration on the Preview step and save. The agent is saved as a Draft.
Workflow Agents
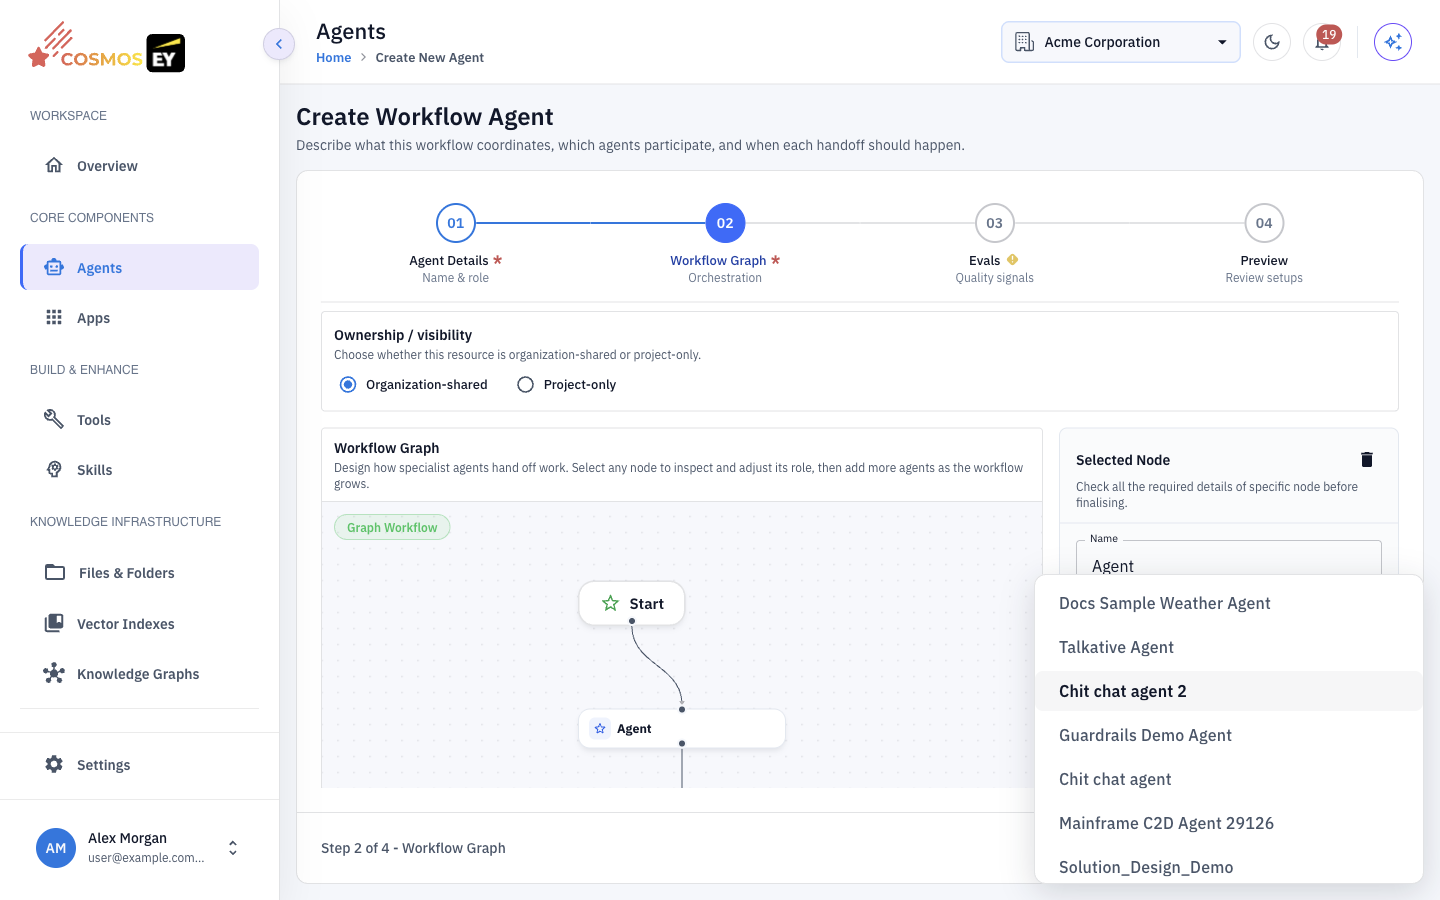
Choose Workflow Agent in the Choose Agent Type dialog to coordinate other agents.
- Graph is the workflow kind for new workflows. Its steps are Agent Details, Workflow Graph, Evals, and Preview. In Workflow Graph you connect deployed agents into a flow.
- Sequential, Parallel, and Loop are older workflow kinds. They are marked as deprecated in the wizard, which recommends Graph for new workflows. Their steps are Agent Details, Evals, and Preview.
- Max Iterations applies to Loop workflows, and Output Key names the value a workflow step writes for later steps.
Testing an Agent
You can test a draft before you deploy it.
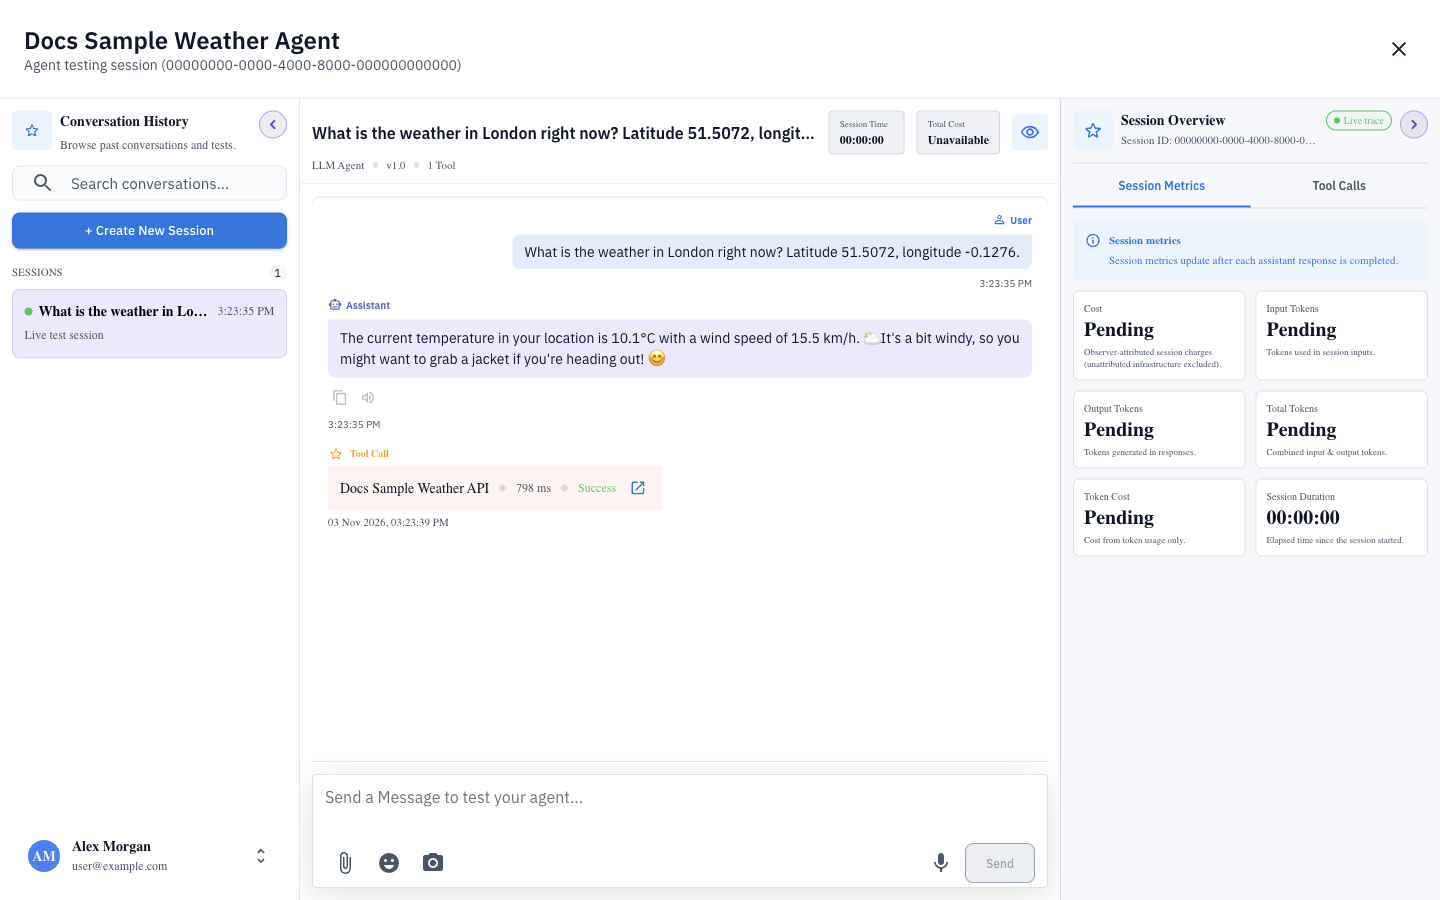
- Open the agent's detail page and click Test. The Test Agent: <name> workspace opens.
- The Conversation History sidebar lists earlier test sessions. Click + Create New Session to start a new one. In the session drawer you can set the Session Name, agent version, Tools, Knowledge Graph, Model Provider, Model, and Temperature, then click Create Draft.
- Send messages to the agent. Suggested follow-up questions appear as chips under responses, and you can rate each response with the thumbs up or thumbs down buttons.
- Open the Session Overview panel to inspect the run: Thinking, Session Metrics, Tool Calls, Evaluations, and Files.
Testing tips
- Start with a simple question before trying multi-tool scenarios.
- Use Tool Calls in the session overview to confirm which tools ran and with which inputs. If the agent skips a tool, mention the tool explicitly in the system prompt and improve the tool description.
- Try requests the agent should refuse, to check your prompt boundaries and guardrails.
- If your prompt uses placeholders such as
{{customer_name}}, test with realistic values.
Deploying and Versions
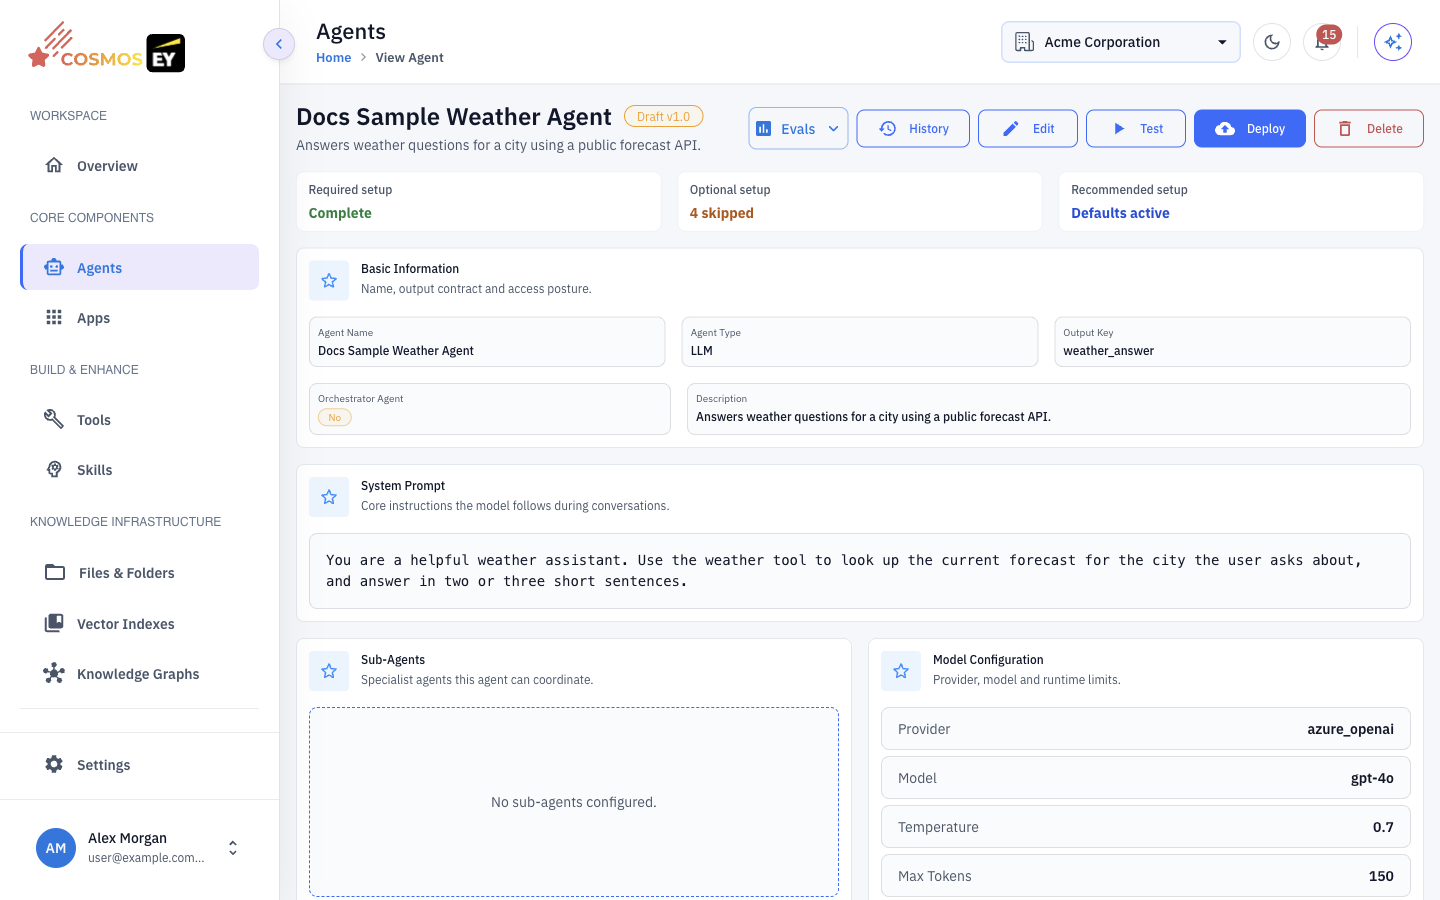
The agent detail page has these actions: History, Edit, Test, Deploy, and Delete. An Evals menu on the same page links to Live Escalated Sessions, Test Run History, Run Test, Auto-generate Eval Setup, and Test Datasets.
| Status | Meaning |
|---|---|
| Draft | Editable work in progress. You can test it. |
| Deployed | A locked version that apps and other agents can use. |
- Click Deploy to turn the current draft into a deployed version.
- To change a deployed agent, click Edit. Your changes are saved as a new draft until you deploy again.
- Click History to browse earlier versions in read-only mode.
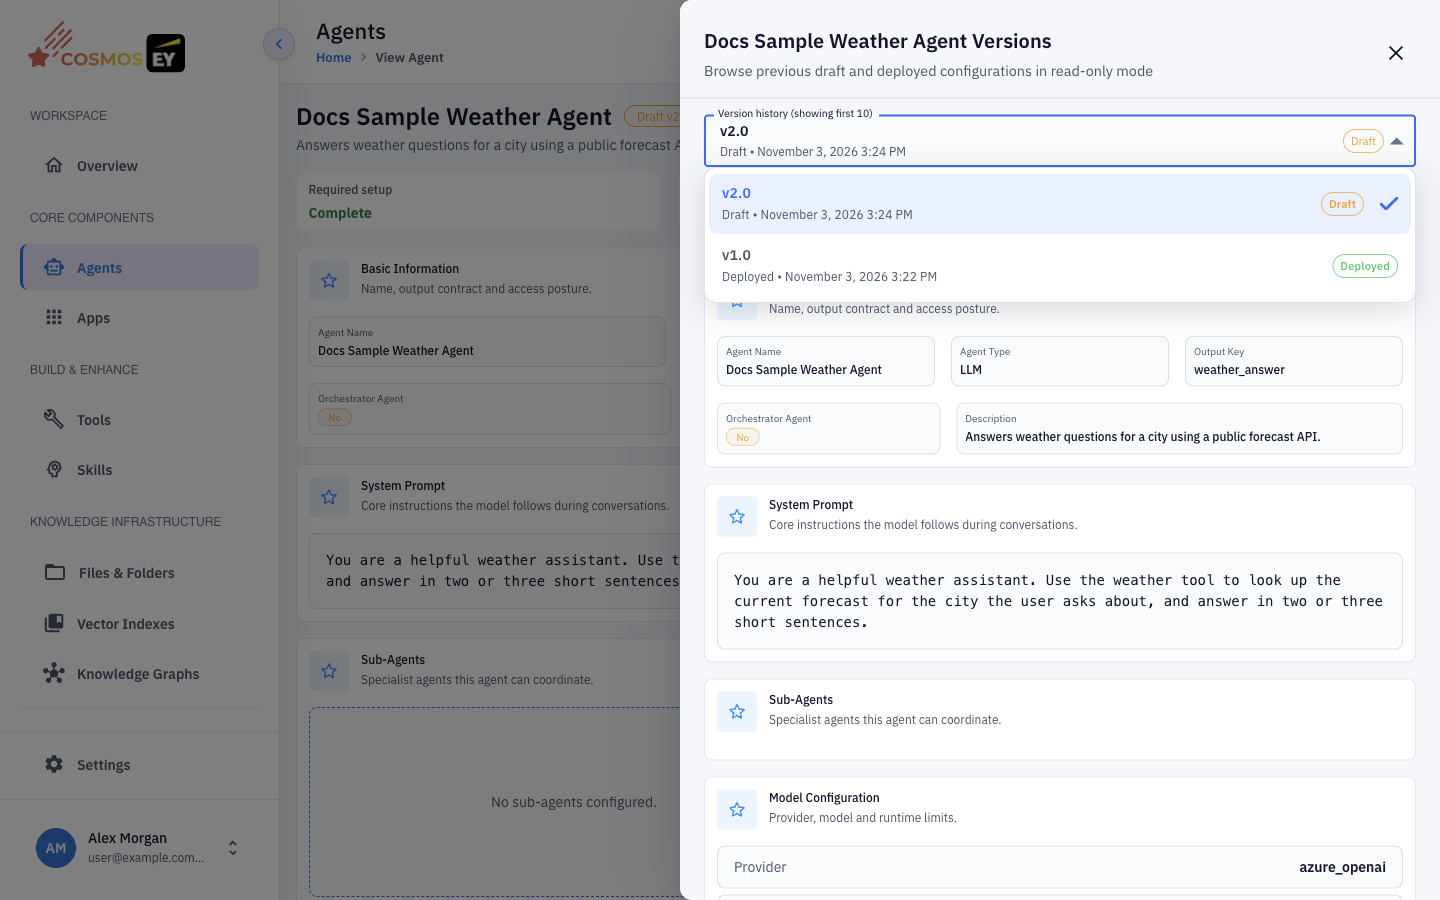
⚠️ Apps and orchestrator agents reference deployed versions. When you deploy a new version, check the apps that use this agent; the app's detail page shows a banner when a newer agent version is available.
Next Steps
- Creating API Tools — build tools for your agents
- Knowledge Base & Document Indexing — ground agents in your documents
- Skills — reuse instructions across agents
- Evals — measure agent quality
- Apps & Publishing — put an agent in front of users
- Observability & Analytics — monitor agents in production