Creating API Tools
Step-by-step guide to building, testing, and deploying API tools in Cosmos
Updated 2026-11-03
Verified 2026-11-03
Overview
An API tool lets an agent call an HTTP endpoint, such as a CRM, a booking system, a weather service, or an internal service with a REST API. When the agent needs live data or needs to take an action, it calls the tool, and Cosmos sends the request and returns the response to the agent.
Use an API tool when the system you want to reach exposes an HTTP endpoint. If your data is in a database, use a Database tool. To use a prebuilt integration, see Custom tools.
Prerequisites
- A Cosmos account with permission to create tools. If Create New is not available on the Tools page, ask your organization admin.
- The URL, HTTP method, and any authentication details for the API you want to call.
Step-by-Step
Step 1: Open Tools
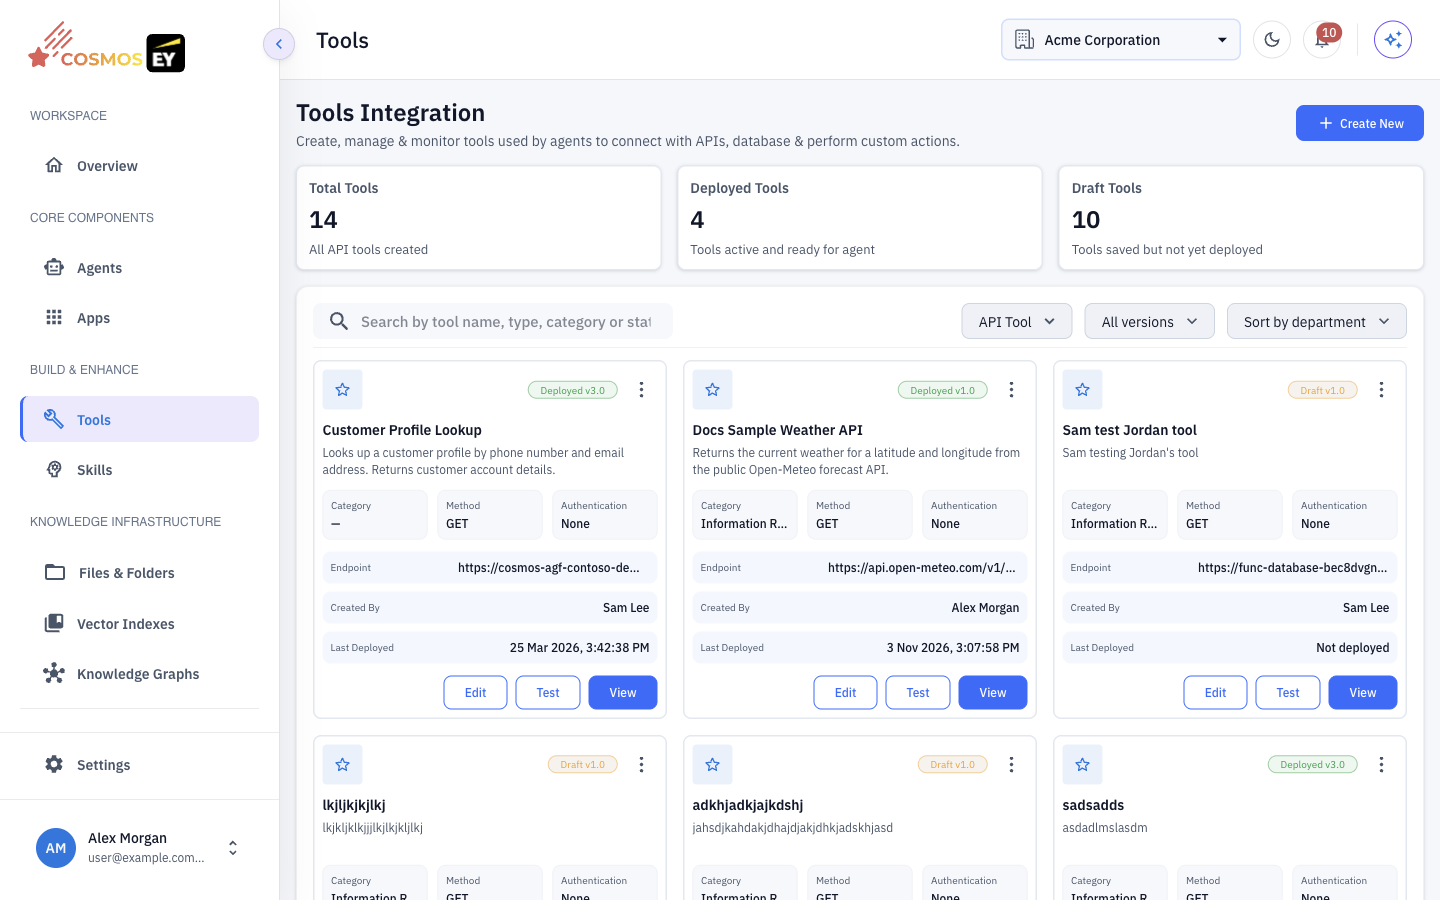
In the sidebar, under Build & Enhance, click Tools. The Tools Integration page lists every tool you can access, with search and filters.
Step 2: Choose API Tool
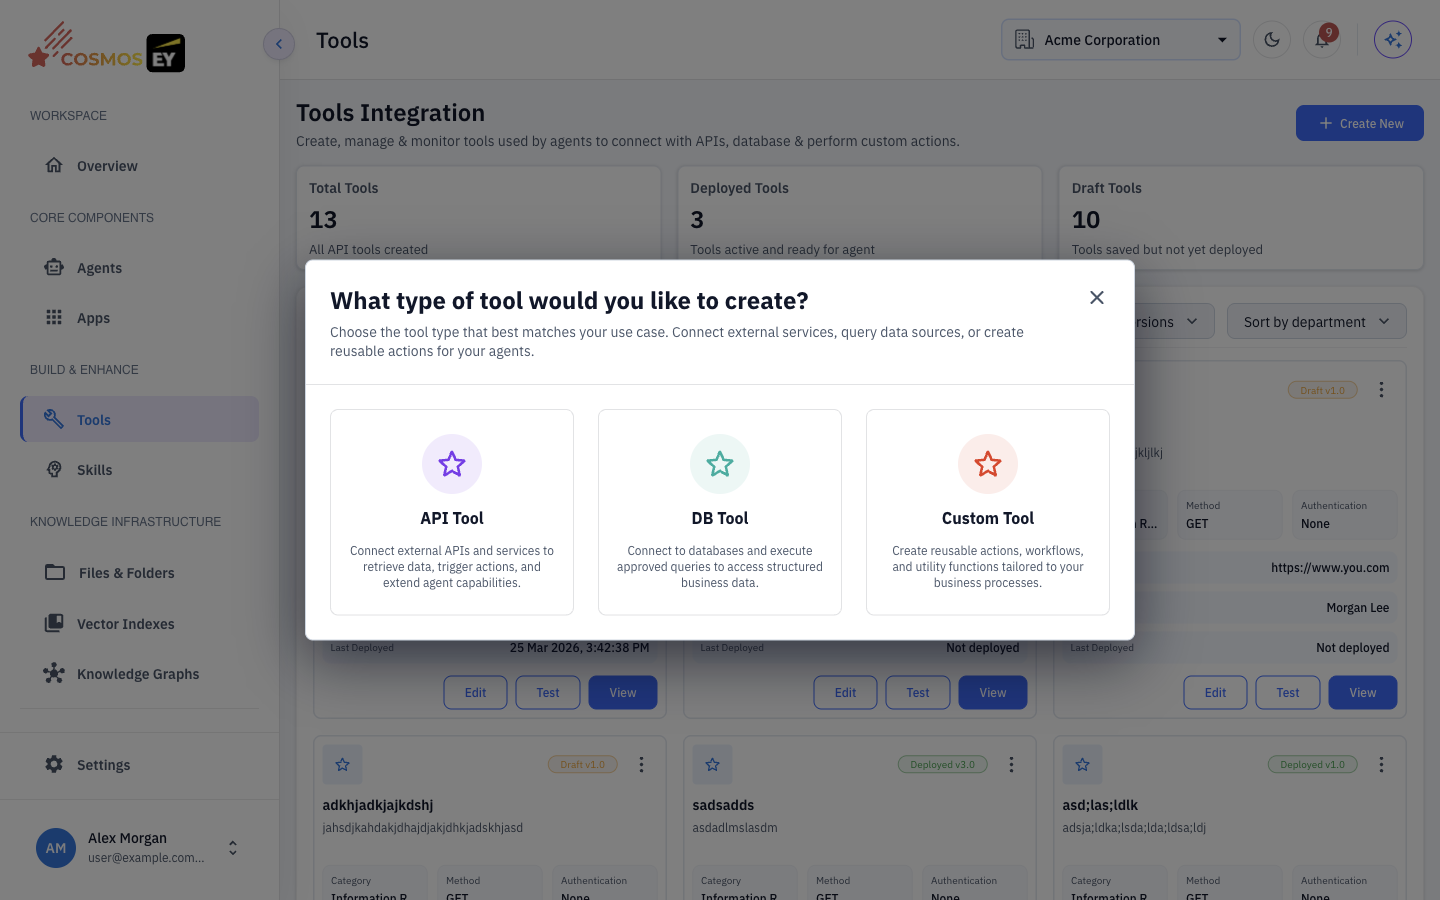
Click Create New. In the What type of tool would you like to create? dialog, choose API Tool. The Create New API Tool wizard opens with two steps: Tool Details and Preview.
Step 3: Fill in the API profile
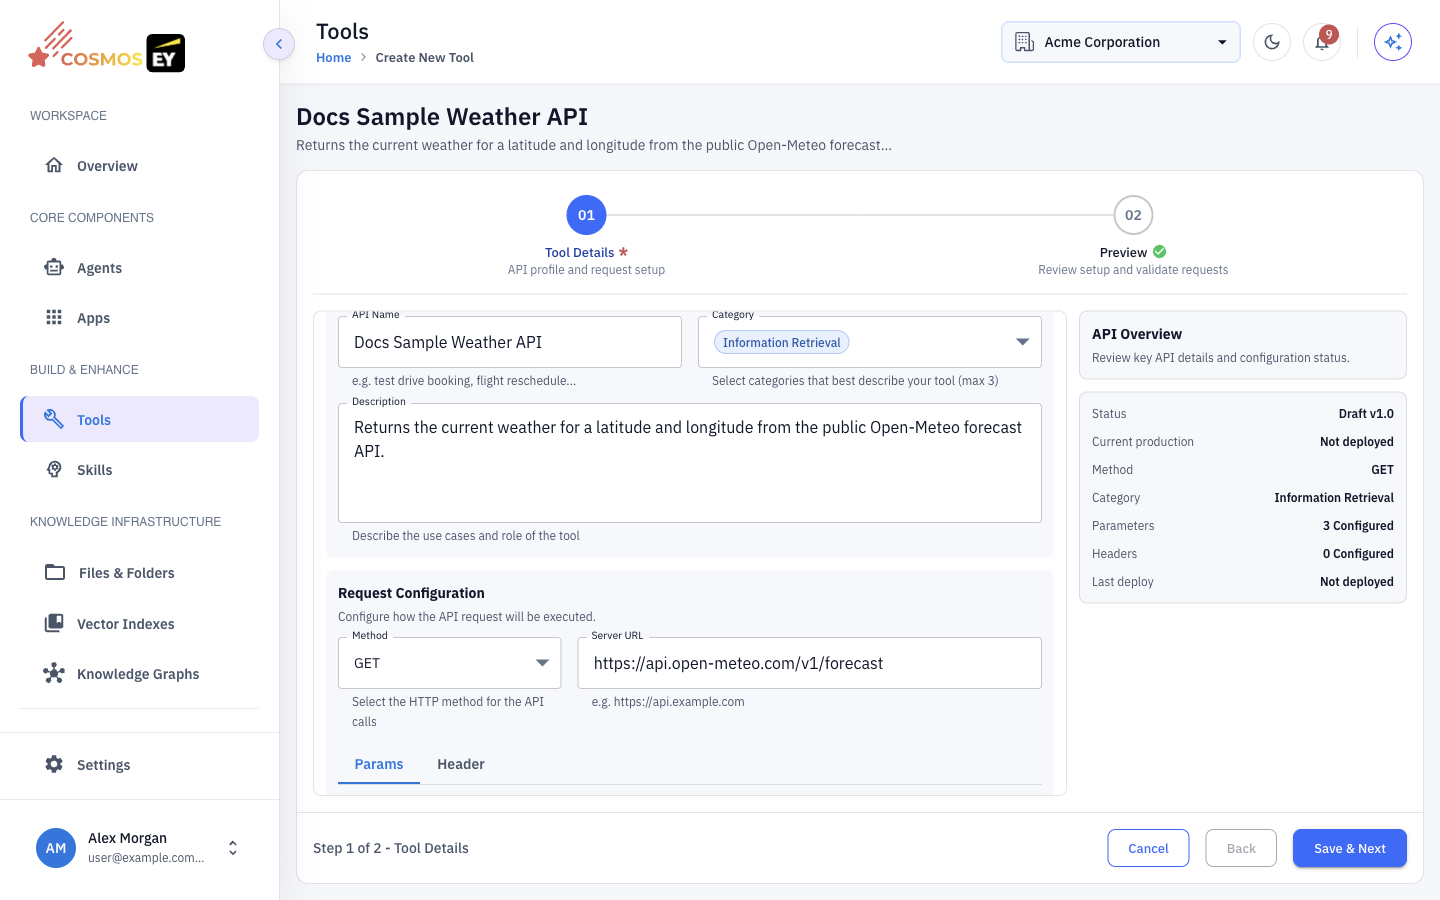
Under API Profile:
| Field | Description | Example |
|---|---|---|
| API Name | A short, descriptive name. It becomes part of the tool identifier that agents see. | get_weather_forecast |
| Category | One or more categories that describe the tool. At least one is required. | External Integrations & API Connectors |
| Description | What the tool does and when an agent should use it (at least 10 characters). | Returns the current weather forecast for a city. Use when the user asks about weather. |
Under Request Configuration:
| Field | Description | Example |
|---|---|---|
| Method | The HTTP method, such as GET or POST. | GET |
| Server URL | The full endpoint to call. | https://api.example.com/v1/forecast |
💡 The description is the most important field. The agent reads it to decide when to call the tool, so describe the inputs it expects and the data it returns.
Step 4: Add parameters and headers
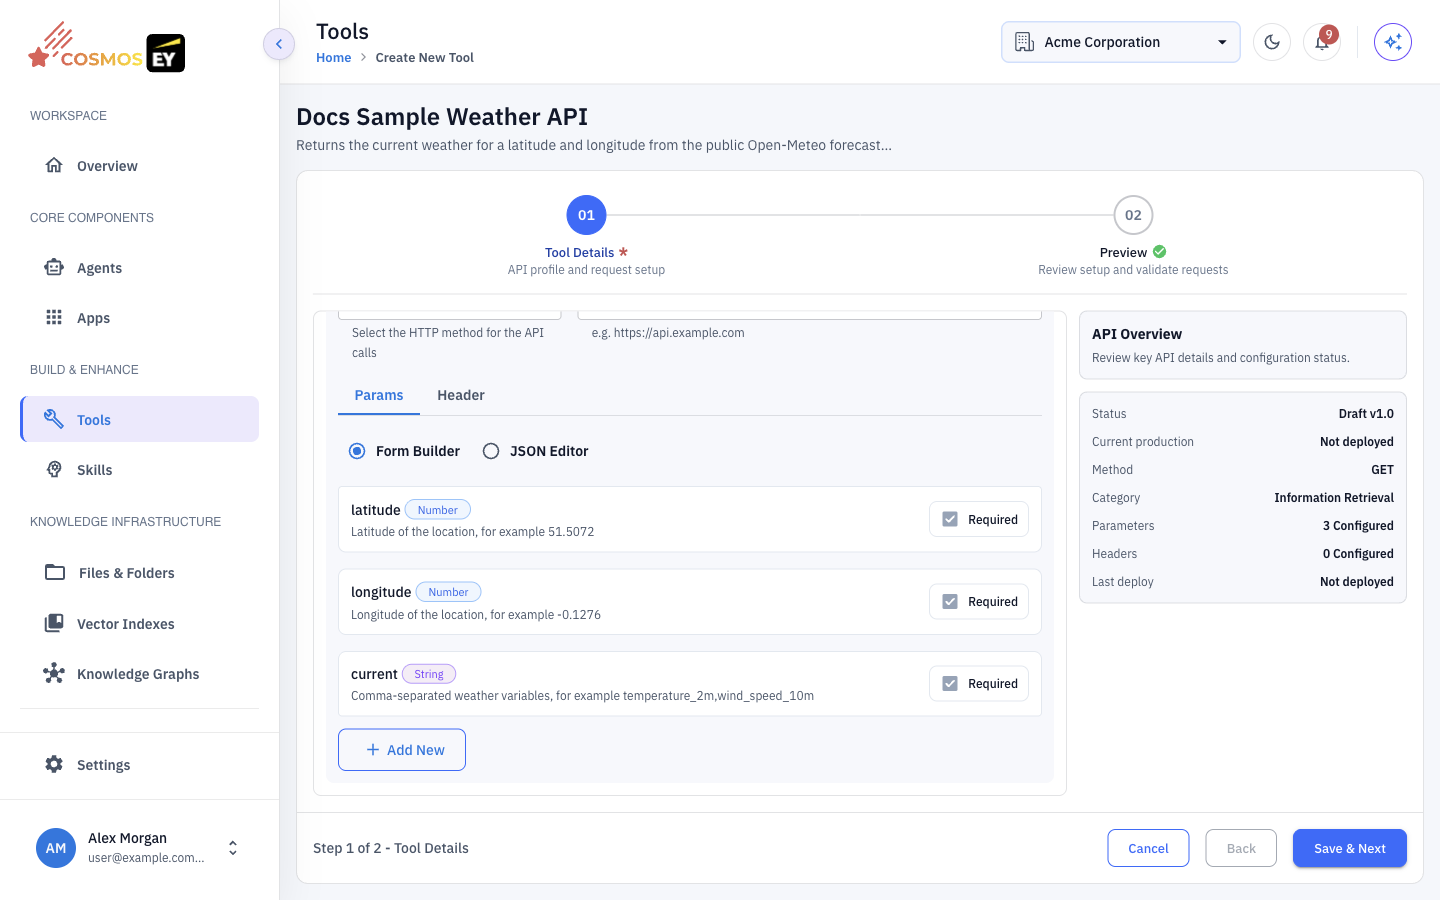
Use the Params and Header tabs to define what the request sends.
- Params — the inputs the agent fills in when it calls the tool. Click Add New for each parameter and give it a name, type, and description.
- Header — static headers sent with every request, such as
Content-Type: application/jsonor an API key header.
You can build the schema with the Form Builder or paste a JSON Schema in the JSON Editor:
{
  "type": "object",
  "properties": {
    "city": {
      "type": "string",
      "description": "The city name to look up"
    },
    "units": {
      "type": "string",
      "description": "Temperature units: metric or imperial"
    }
  },
  "required": ["city"]
}
Authentication
Add credentials as headers, in the form the external API expects:
| Auth method | Header | Value |
|---|---|---|
| API key | x-api-key | your_api_key |
| Bearer token | Authorization | Bearer your_token |
| Basic auth | Authorization | Basic base64_credentials |
If your organization has connectors configured, you can also attach one under Connector Attachments with Add Connector, choosing the Service, Provider, and Capability.
Step 5: Preview and save
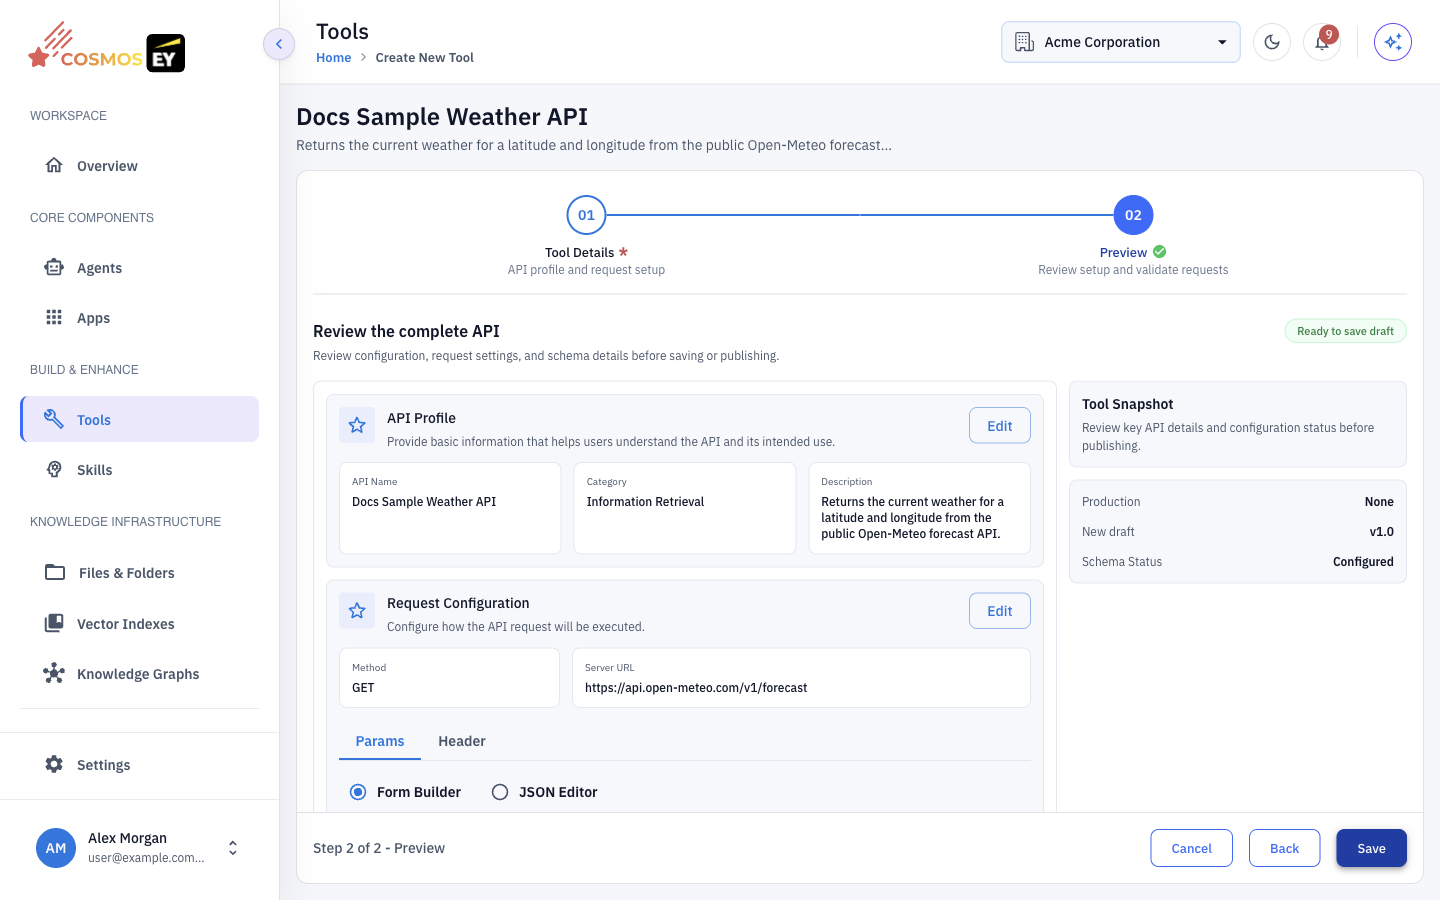
The Preview step shows the complete configuration and the status Ready to save draft. Review it and click Save. The tool is saved as a Draft and is not yet available to agents.
Step 6: Test the tool
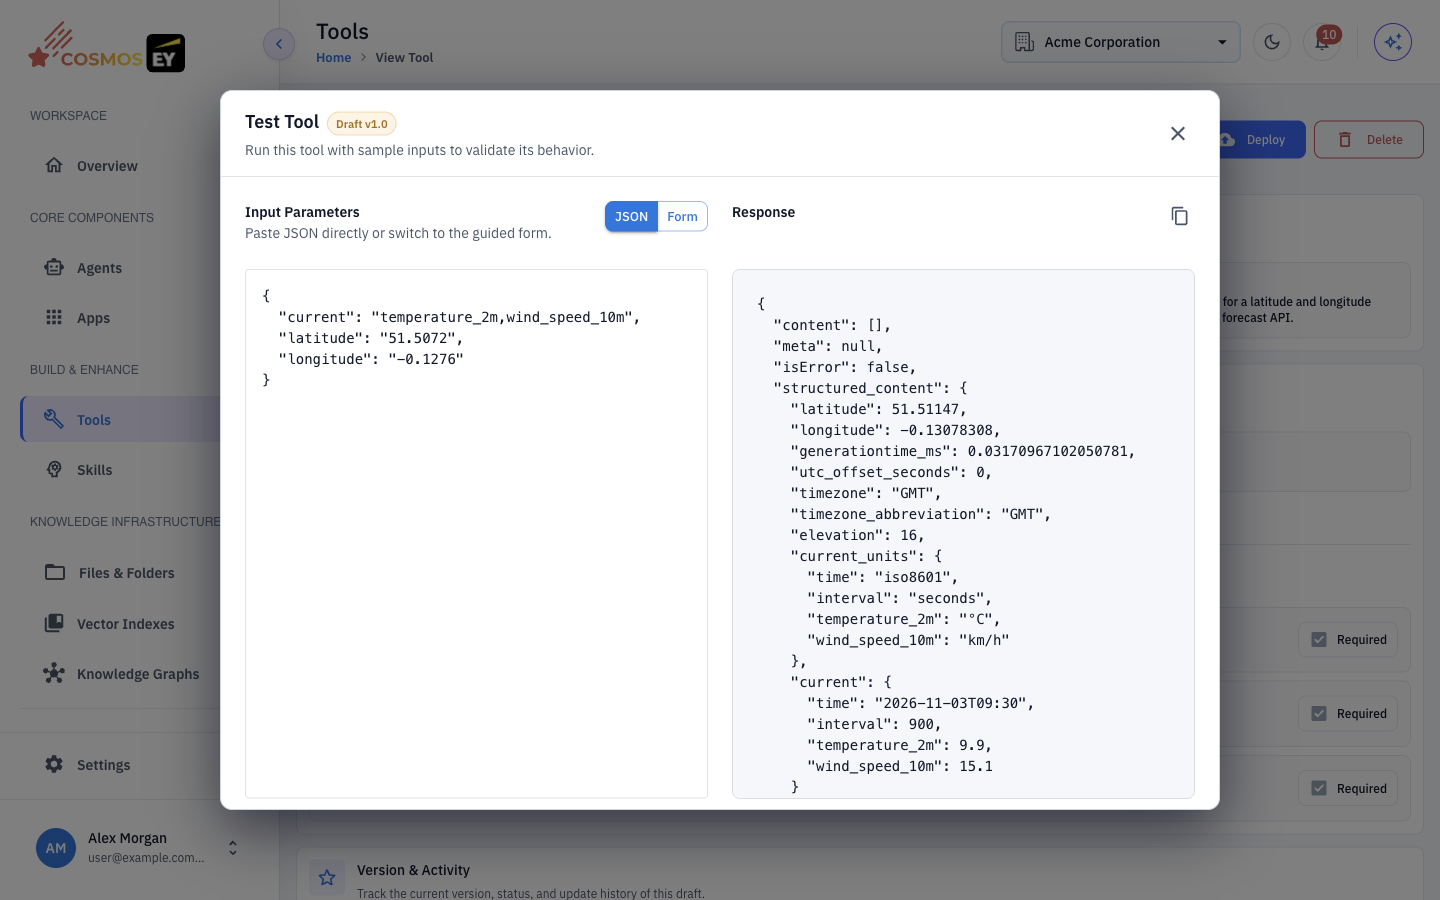
On the tool's detail page, click Test. The Test Tool dialog shows Input Parameters generated from your schema. Enter sample values, run the test, and check the Response.
If the test fails, check that the server URL is reachable, required headers and credentials are set, and the inputs match what the API expects.
Step 7: Deploy the tool
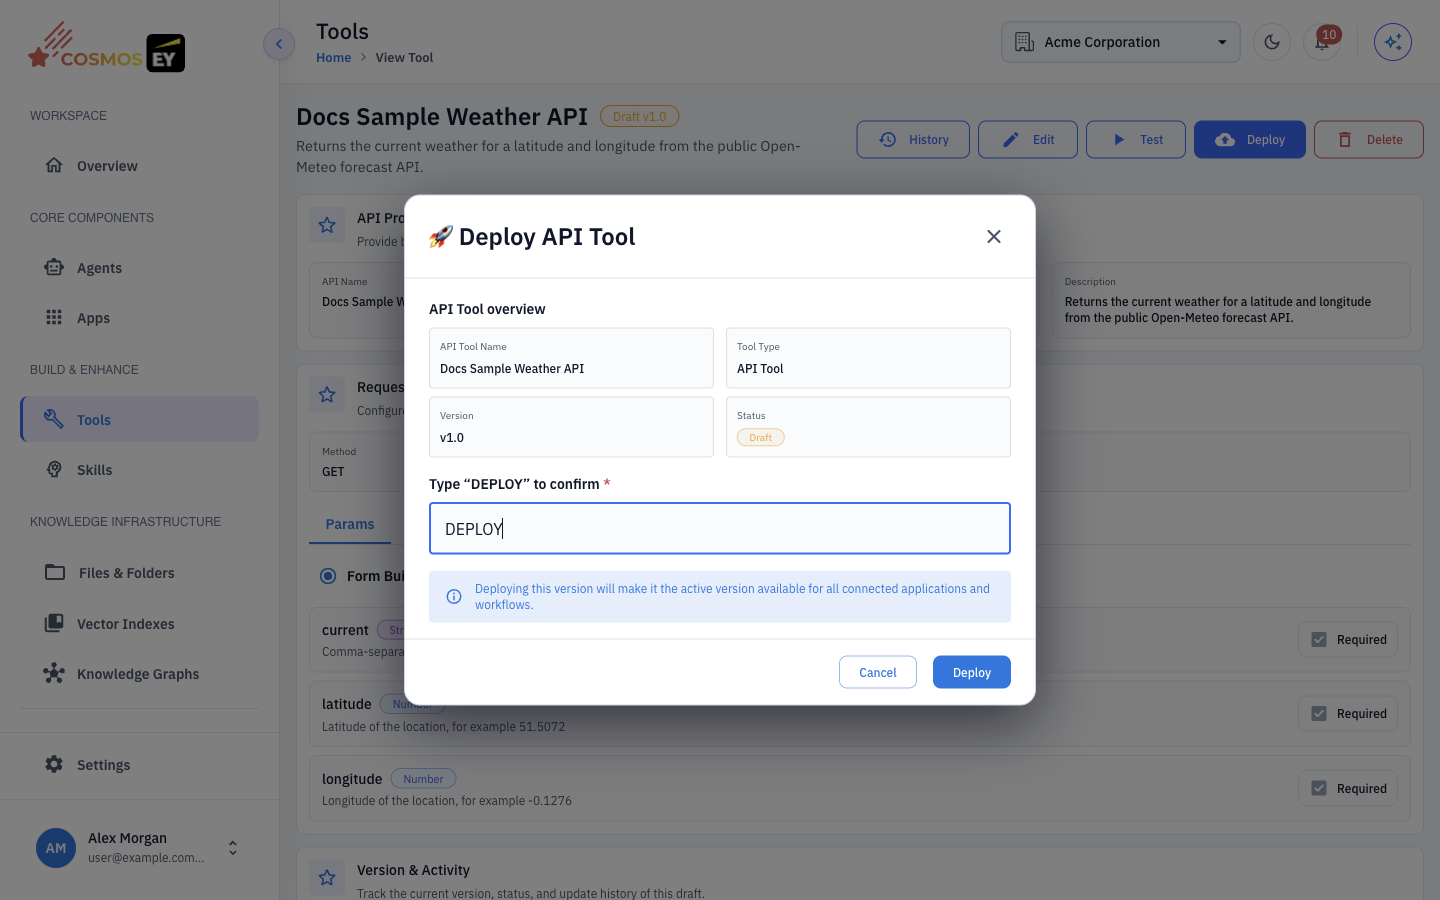
Click Deploy on the detail page and confirm. The tool status changes from Draft to Deployed, and the tool appears in the API tab when you attach tools to an agent.
The tool detail page also has History (earlier versions), Edit, and Delete. Editing a deployed tool creates a new draft that you deploy again when it is ready.
Verify
- On the Tools Integration page, confirm the tool shows as Deployed.
- Attach the tool to an agent in the agent's Skills & tools step. See Building & Testing Agents.
- Test the agent with a question that should trigger the tool, such as "What's the weather in Berlin?", and check Tool Calls in the session overview.
Tips & Best Practices
- Write clear descriptions. Vague descriptions lead to missed or wrong tool calls.
- Keep the input schema small. Only include parameters the agent must supply. Put fixed values in headers or the URL.
- Use meaningful names.
get_weather_forecastis clearer to the agent thantool1. - Test before deploying. Run at least one successful test with realistic inputs.
- Protect credentials. Prefer scoped, short-lived keys, and rotate them regularly.